Blackwork Embroidery: History, Stitches, and How to Start
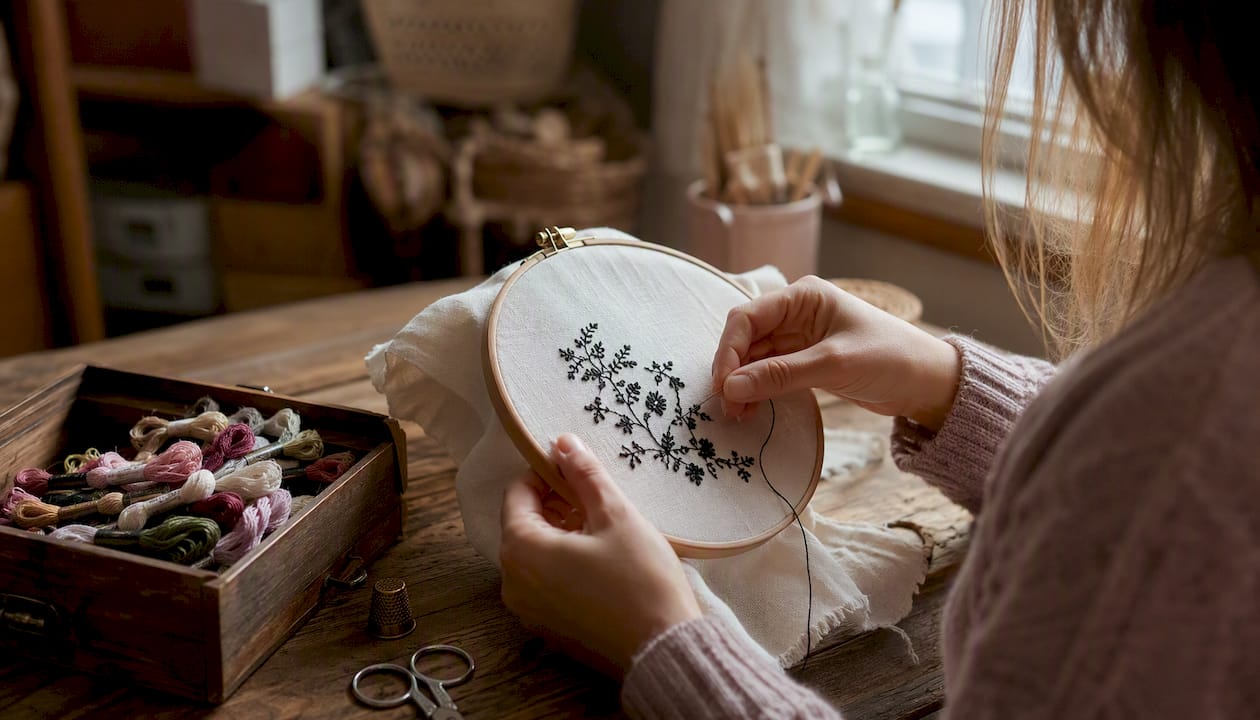
Blackwork Embroidery: History, Stitches, and How to Start ! Hands stitching blackwork embroidery on white linen Blackwork embroidery is a mostly monochrome needlework style worked in black thread on white or off-white fabric, built around the reversible Holbein (double-running) stitch and geometric fill patterns.
Blackwork Embroidery: History, Stitches, and How to Start
Blackwork embroidery is a mostly monochrome needlework style worked in black thread on white or off-white fabric, built around the reversible Holbein (double-running) stitch and geometric fill patterns. The Royal School of Needlework and the Embroidery Guild of America both recognize it as one of the oldest surviving European embroidery traditions, with roots in Tudor England and possible antecedents stretching back to Moorish and Islamic textile arts.
A few things set it apart at a glance:
- Signature stitch: The Holbein (double-running) stitch produces identical lines on both sides of the fabric, a property that mattered enormously for Tudor collars and cuffs worn inside and out.
- Traditional materials: Black silk thread on white or off-white evenweave linen or cotton, though modern stitchers commonly substitute stranded cotton or perle cotton.
- Historical uses: Collars, cuffs, smocks, coifs, and household linens from roughly the 15th through 17th centuries.
- Modern adaptations: Contemporary blackwork often incorporates tonal shading, metallic accents, and pictorial subjects well beyond the original geometric fills.
Table of Contents
- What is blackwork embroidery, and where did it come from?
- How blackwork is made: counted-thread vs. free-stitch approaches
- What materials do you need for blackwork?
- Fill patterns, motifs, and how tonal shading works
- Where blackwork appears: historical garments and modern uses
- How to start your first blackwork sampler
- Common beginner mistakes and how to avoid them
- How does blackwork compare to cross-stitch and redwork?
- Planning your blackwork project like a pro
- Key Takeaways
- The part of blackwork nobody warns you about
- Flossom helps you track every blackwork decision
- Useful sources for going deeper
What is blackwork embroidery, and where did it come from?
The story most people hear is that Catherine of Aragon brought blackwork to England when she married Henry VIII in 1509, which is why it was long called "Spanish blackwork." Historians treat that attribution as plausible but unproven. Geoffrey Chaucer described a carpenter's wife wearing a "collar of white, broidered all before and eke behind" in The Canterbury Tales in the late 14th century, placing black-on-white embroidery in England well before Catherine arrived. The technique almost certainly had multiple entry points into Europe, including Moorish textile traditions in Spain and Slavic embroidery practices, rather than a single royal origin.
What is certain is that blackwork reached peak popularity during the Tudor and Elizabethan periods, roughly 1500–1620. Hans Holbein the Younger's court portraits are the most reliable visual evidence: his paintings of Henry VIII, Anne of Cleves, and their courtiers show collars and cuffs covered in precise geometric blackwork, and the stitch named after him reflects exactly that reversible, portrait-perfect quality. The EGA notes that Holbein's paintings provide some of the clearest documentation of how the embroidery actually looked on garments.
After the Elizabethan era, blackwork declined sharply as fashion moved toward lace and colored embroidery. It saw a scholarly revival in the 20th century, driven partly by museum collections and partly by the growing needlework guild movement. Today the Metropolitan Museum of Art and the Victoria and Albert Museum both hold period garments with surviving blackwork, giving researchers and stitchers direct access to original examples.
How blackwork is made: counted-thread vs. free-stitch approaches
Two distinct working methods fall under the blackwork umbrella, and understanding the difference saves beginners a lot of confusion.
Counted-thread blackwork is worked on evenweave fabric where every thread in the warp and weft is visible and countable. The stitcher follows a chart, counting threads to place each stitch precisely. This produces the crisp, geometric fills that define classic Tudor blackwork. The RSN StitchBank describes this as the traditional mode, suited to linen or Hardanger fabric where the weave is consistent enough to count accurately.
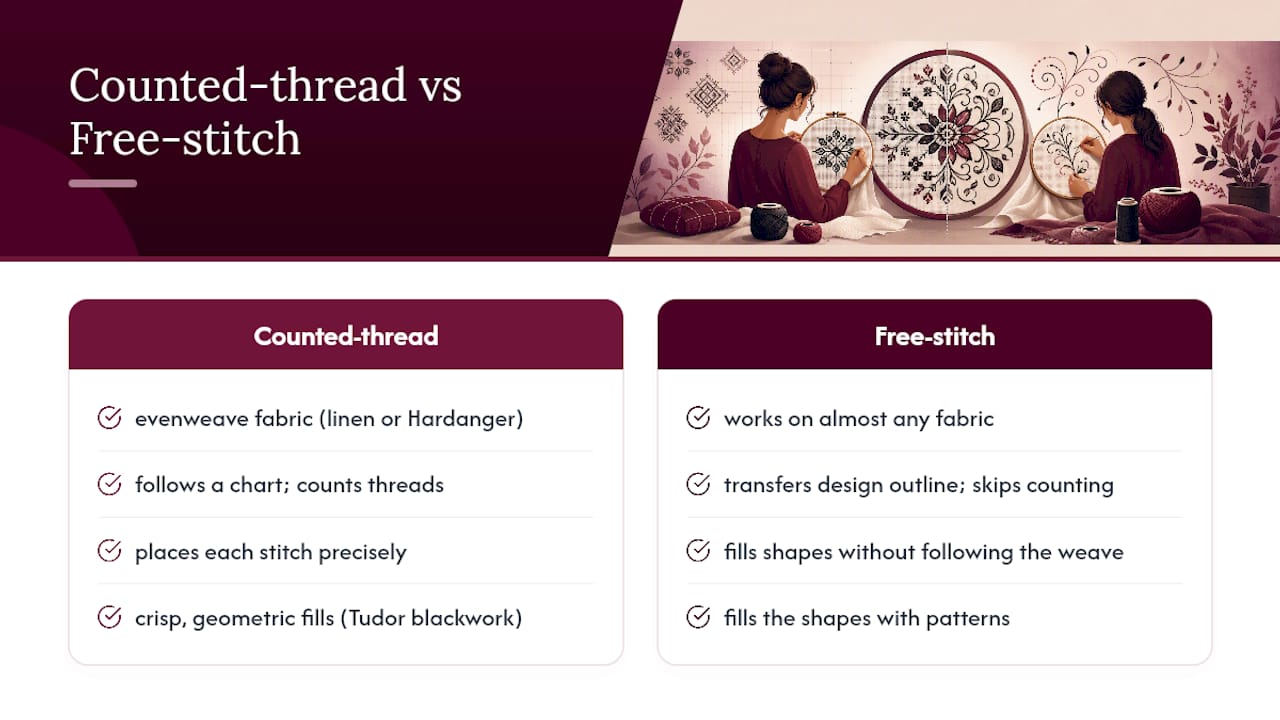
Free-stitch blackwork skips the counting entirely. The stitcher transfers a design outline to the fabric first, then fills the shapes with patterns without following the weave. This approach works on almost any fabric and is more forgiving for beginners who find counted work intimidating.
The foundational stitches
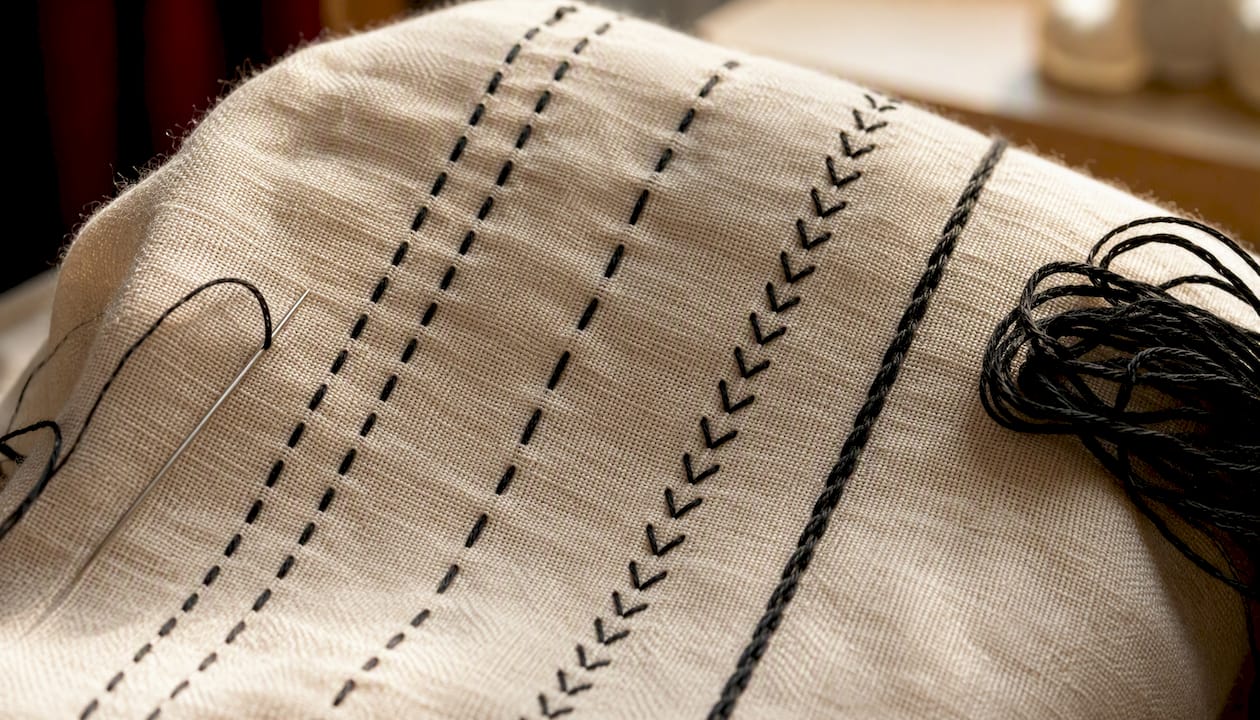
The Holbein stitch, also called double-running, is the heart of the technique. You run a line of running stitches in one direction, then turn and fill the gaps on the return pass, producing a solid line that looks identical from front and back. Backstitch creates a similar solid line but is not reversible, so it works better for free-stitch blackwork or areas that won't be seen from the reverse. Stem stitch appears occasionally for curved outlines, giving a slightly raised, rope-like edge.
Pro Tip: Before you start filling any shape, stitch the complete outer boundary first. Practitioners consistently recommend this approach because it locks in your counting reference points and prevents the fill patterns from drifting at the edges. Starting fills without a boundary is the single most common source of counting errors for beginners.
What materials do you need for blackwork?
Traditional blackwork calls for a specific combination of materials, and getting the fabric choice right matters more than almost anything else.
Traditional materials:
- Black silk thread (historically the standard; produces a rich, slightly lustrous line)
- White or off-white evenweave linen or cotton fabric
- Tapestry needle (blunt tip for counted work on evenweave)
- Embroidery hoop or slate frame to keep tension even
Modern substitutions that work well:
- Stranded cotton (DMC or Anchor) in black or near-black; easy to find and forgiving to stitch
- Perle cotton for bolder outlines with a slight sheen
- Metallic threads or small beads as accents (a contemporary addition, not traditional)
- 28-count evenweave or 22-count Hardanger for practice; Aida works in a pinch but the large holes can make fine fill patterns look chunky
For thread strand counts, the general rule is two strands for outlines and one strand for interior fills. This difference in weight is what gives blackwork its characteristic graphic depth: a strong outer edge with delicate patterning inside. You can read more about embroidery specialty thread types to understand how silk, cotton, and metallic threads behave differently under tension.
A good light source and a needle threader round out the basic toolkit. Blackwork on fine linen in low light is genuinely difficult, and eye strain is a real problem on long sessions.
Fill patterns, motifs, and how tonal shading works
The fill patterns are where blackwork gets interesting. Classic Tudor designs use geometric repeats called diaper patterns: lattice grids, seed patterns, chevrons, and interlocking diamonds. Each pattern is a small repeating unit, usually 4–10 stitches across, that tiles across the interior of a shape. The visual effect depends entirely on how dense the pattern is.
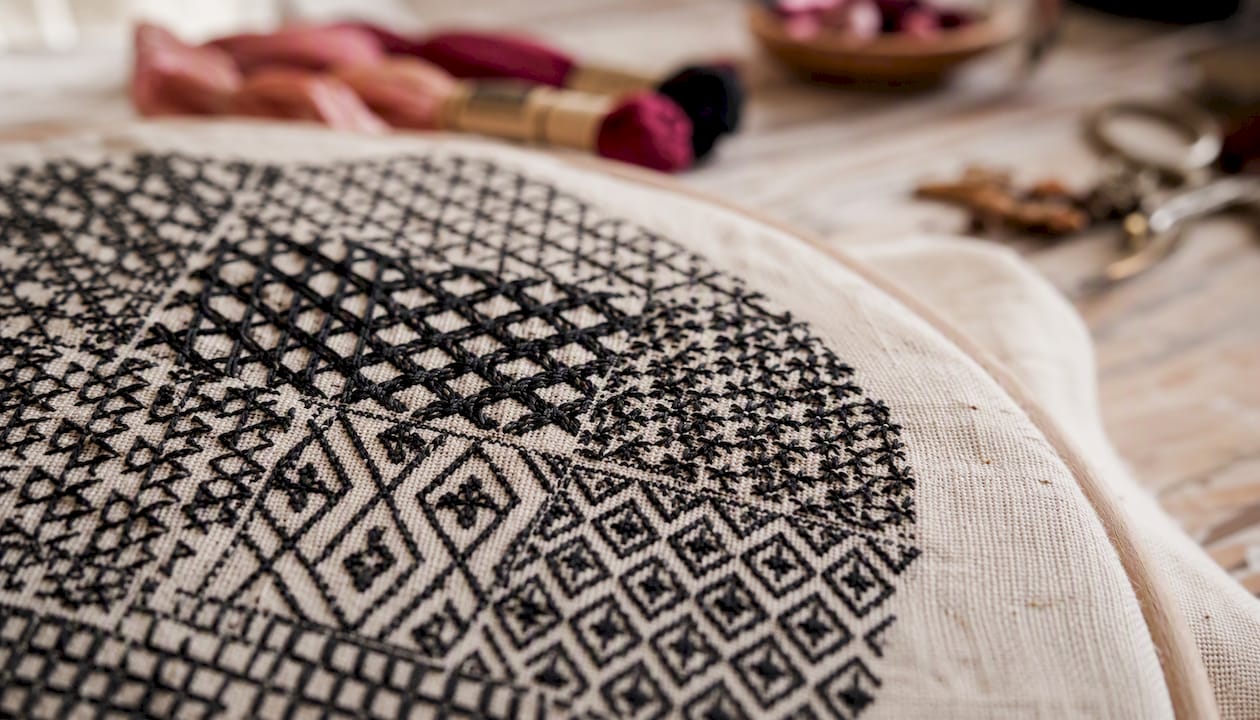
Tonal shading is the modern evolution of this principle. By placing a dense fill pattern in shadow areas and a sparse one in highlight areas, a stitcher can create the illusion of three-dimensional form using nothing but black thread. The Royal School of Needlework specifically highlights this shift from purely geometric Tudor fills toward pictorial and portrait-like results, where stitch density does the work that color would do in other embroidery styles.
Common historical motifs include rinceaux (scrolling vine and leaf patterns), Tudor florals, and stylized animals. Contemporary blackwork designs extend this to maps, architectural subjects, and realistic portraits of pets and people.
Pro Tip: Use a thicker thread (two strands of stranded cotton or a single strand of perle) for outlines and drop to one strand of stranded cotton for fills. The contrast in weight makes the design read clearly from a distance and prevents the fill from visually competing with the boundary. Keeping a note of which thread and strand count you used for each section makes it much easier to repeat the effect on a second project.
Where blackwork appears: historical garments and modern uses
The reversibility of the Holbein stitch was not an aesthetic choice. Tudor shirts, smocks, and coifs were visible from both sides when worn, and a garment with messy thread tails on the inside was a mark of poor workmanship. The V&A's collection includes a jacket and a smock with surviving blackwork embroidery, both showing how the technique appeared on everyday and formal clothing. Collars and cuffs were the most common locations because they were the most visible parts of an outfit and could be detached and laundered separately.
Household linens, including pillowcases, table coverings, and coifs (close-fitting caps), also carried blackwork. The geometric patterns were relatively fast to stitch compared to polychrome crewelwork, which made them practical for large household projects.
Modern stitchers use blackwork for framed panels, wearable accents on contemporary clothing, and hobbyist motifs ranging from house portraits to botanical studies. Guild exhibitions, including those organized by the Embroidery Guild of America, regularly feature contemporary blackwork that pushes the tonal shading technique into near-photographic territory.
How to start your first blackwork sampler
A small sampler of 4–6 inches is the right first project. It gives you enough space to practice the Holbein stitch and two or three fill patterns without committing to a large design.
Materials checklist:
- 28-count evenweave linen or cotton, at least 8 × 8 inches (to allow for hoop margins)
- One skein of black stranded cotton (DMC 310 is the standard choice)
- Size 24 or 26 tapestry needle
- 5- or 6-inch embroidery hoop
- A simple geometric pattern (a single Tudor floral motif or a small geometric grid works well)
Step-by-step starter sequence:
- Prepare the fabric. Hem or tape the edges to prevent fraying. Find and mark the center with a light pencil line or basting thread.
- Transfer or count the pattern. For counted work, use a gridded chart and start from the center. For free-stitch, trace the outline lightly with a water-soluble pen.
- Stitch the outer boundary. Using two strands, work the complete outline of your motif in Holbein stitch before touching any fill.
- Add interior fill patterns. Drop to one strand and work your chosen diaper pattern inside the outlined shape, starting from the center and working outward.
- Finish thread ends. Weave ends under existing stitches on the back rather than knotting; knots create lumps and can pull through fine evenweave.
- Care for the finished piece. Hand wash gently in cool water with a mild detergent, roll in a clean towel to remove excess water, and press face-down on a padded surface while still slightly damp.
A sampler this size typically takes several hours for a complete beginner, depending on how much time you spend counting. Using two strands for the outline and one for the fill is the single most useful habit to build from the start.
Common beginner mistakes and how to avoid them
Inconsistent tension is the most visible problem in beginner blackwork. The Holbein stitch pulls the fabric slightly with each pass, and if you stitch tightly on the first pass and loosely on the return, the line looks uneven. Test your tension on a scrap of the same fabric before starting the main project.
Wrong fabric count is the second common issue. Fabric with too large a weave count (14-count Aida, for example) makes fine fill patterns look coarse and widely spaced. For blackwork, 28-count evenweave gives you the density to make geometric fills look crisp.
Using the same strand thickness for outline and fill flattens the design. The outline and the fill blend together visually, and the motif loses its definition. This is the mistake that makes beginner blackwork look unfinished even when the stitching itself is technically correct.
Not securing thread ends neatly creates problems on both sides of the fabric. For a reversible piece, the back needs to look as clean as the front. Weave ends through at least four stitches on the back before trimming.
On caring for blackwork pieces, whether historic or new: store flat or rolled (never folded) in acid-free tissue, away from direct light. Black thread, especially silk, can fade or transfer color to adjacent fabric if stored damp. For pieces with metallic accents, avoid plastic bags, which trap moisture. The RSN StitchBank guidance on blackwork is a reliable reference for technique-specific preservation notes.
One more practical tip: parking threads while working multiple fill areas keeps your working thread from tangling and makes it easier to maintain consistent tension across a large design.
How does blackwork compare to cross-stitch and redwork?
These three techniques are often grouped together as "monochrome counted embroidery," but they work quite differently in practice.
Blackwork vs. cross-stitch:
- Cross-stitch builds an image from X-shaped stitches on a grid; blackwork builds it from running lines and fill patterns.
- Blackwork's Holbein stitch has a rhythm that many stitchers find faster than cross-stitch once the counting clicks: you run one direction, then return, rather than completing each X individually.
- Cross-stitch is generally more forgiving of fabric choice; blackwork requires evenweave for counted work to look right.
- The visual result is different: cross-stitch produces a pixelated, solid-fill look; blackwork produces a graphic, line-based look with visible negative space.
Blackwork vs. redwork:
- Redwork uses a single red thread (traditionally Turkey red cotton) to outline designs, usually in backstitch or stem stitch, without fill patterns.
- Redwork is almost always free-stitch; blackwork can be either counted or free.
- Historically, redwork peaked in American quilting and needlework in the late 19th century; blackwork's peak was Tudor England, roughly 300 years earlier.
- Blackwork is generally more technically demanding because of the fill pattern counting; redwork's appeal is its simplicity.
When to choose blackwork: Pick it when you want a graphic, high-contrast result with visual texture, or when you want to practice counted-thread discipline without committing to a full cross-stitch project. It suits architectural subjects, botanical designs, and anything where line quality matters more than color.
Planning your blackwork project like a pro
Good project planning separates a finished sampler from a half-stitched hoop gathering dust. Before you cut fabric, write down your thread choices, strand counts for each section, and which fill patterns you plan to use where. This sounds obvious, but tonal blackwork with three or four different fill densities gets confusing fast, especially if you put the project down for a week.
Converting between thread brands is a real practical issue. If a pattern calls for a specific silk thread and you want to substitute stranded cotton, the color match is straightforward (black is black), but the weight and sheen differ. Flossom's thread brand conversion tool covers how to handle substitutions across 55 brands, which matters when you're working from a pattern that specifies a brand you don't stock.
Pro Tip: Document your thread choices and strand counts in a project note before you start stitching. For tonal blackwork, note which fill pattern corresponds to which density level (light, mid, dark) so you can replicate the shading on future projects or scale the design up. Flossom's project tracking lets you attach photos and notes to each WIP, so your decisions stay with the project rather than on a sticky note that disappears.
Estimating how much thread you need is another place where beginners get caught short. A single skein of DMC 310 covers more ground than most people expect for outline work, but dense fill patterns consume thread quickly. Planning your material needs before you start prevents mid-project shopping trips.
Key Takeaways
Blackwork embroidery is a counted-thread and free-stitch tradition built on the reversible Holbein stitch, traditionally worked in black silk on white evenweave linen, with Tudor England as its historical peak and tonal shading as its modern evolution.
| Point | Details |
|---|---|
| Defining stitch | The Holbein (double-running) stitch produces identical lines front and back, essential for Tudor garments. |
| Traditional materials | Black silk thread on white evenweave linen or cotton; modern stitchers substitute stranded or perle cotton. |
| Outline before fill | Stitch the complete outer boundary first to lock in counting reference points and prevent fill drift. |
| Tonal shading | Varying fill density and thread thickness creates light and dark areas without using multiple colors. |
| Flossom for planning | Flossom tracks thread choices, strand counts, and project notes across 55 brands, keeping tonal shading decisions repeatable. |
The part of blackwork nobody warns you about
Most introductions to blackwork focus on the Holbein stitch and the Tudor history, which are genuinely fascinating. What they underplay is how much the technique rewards patience with counting over raw stitching speed.
The first time you work a Holbein stitch correctly, the return pass clicking into place feels almost mechanical, like a zipper closing. That rhythm is the real appeal of blackwork, and it's something cross-stitch doesn't quite replicate. Small samplers teach you counting and tension simultaneously, and the visual payoff, a crisp geometric motif that looks the same on both sides, arrives faster than you'd expect.
The tonal shading direction that the Royal School of Needlework champions is worth taking seriously. A single black thread, placed at different densities, can render a face or a landscape with more subtlety than most beginners imagine. That's the part of the technique that keeps experienced stitchers coming back to it.
Flossom helps you track every blackwork decision
Starting a blackwork project means making a surprising number of small decisions: which fill pattern goes where, how many strands for each section, which thread brand you're substituting. Those decisions compound quickly on a tonal piece with multiple density levels.

Flossom keeps all of it in one place. Log your thread stash, attach pattern photos, and note strand counts directly in your project record so nothing gets lost between sessions. The project time calculator helps you set a realistic time budget for a sampler before you start, and the brand conversion tool covers all 55 supported thread brands if you need to swap silk for cotton or match a discontinued color. Auto-generated shopping lists compare what your pattern needs against what you already own, so you only buy what's actually missing. Try Flossom free with DMC and Anchor threads and up to three projects, no subscription required.
Useful sources for going deeper
| Source | What it offers |
|---|---|
| RSN StitchBank — Blackwork | Authoritative stitch definitions, counted vs. free-stitch distinctions, and technique notes from the Royal School of Needlework |
| EGA — Blackwork Techniques | Overview of materials, foundational stitches (Holbein, backstitch), and historical context from the Embroidery Guild of America |
| RSN — Blackwork Course Page | Modern tonal shading techniques and course descriptions from the Royal School of Needlework |
| V&A — Jacket with Blackwork | Museum object record for a period jacket with surviving blackwork embroidery |
| V&A — Smock with Blackwork | Museum object record for a blackwork smock showing historical use on everyday garments |
| Needlework Tips — Outlines First | Practitioner guidance on workflow, strand counts, and the outlines-first approach for beginners |
| Metropolitan Museum of Art | Searchable online collection includes period garments and textiles with blackwork; search "blackwork embroidery" in the Met's collections portal |
| Embroidery Guild of America (EGA) | Guild pages, regional chapters, and educational resources for stitchers at all levels; egausa.org |
Recommended
We make Flossom — the calm app for cross-stitchers and embroiderers who want their stash, projects, fabric and shopping list in one tidy place.