
How to Track Multiple Cross Stitch WIPs Effectively
Learn how to track multiple cross stitch WIPs effectively. Boost your progress, minimize errors, and manage your projects with ease.

How to Track Multiple Cross Stitch WIPs Effectively
A cross stitch WIP tracker is a system, digital or analog, that records each project's progress, materials, and position so you can pick up any piece without losing your place. Stitchers who track multiple cross stitch WIPs consistently report fewer counting errors, less project abandonment, and more realistic completion estimates. The standard industry term for this practice is "cross stitch project management," and it covers everything from pattern marking to thread inventory. Whether you stitch one piece a week or rotate through six at once, a structured tracking routine is the difference between a thriving WIP pile and a graveyard of half-finished hoops.
What tools do you need to track multiple cross stitch WIPs?
The right tools make or break a multi-WIP system. Without them, you spend more time reconstructing your place than actually stitching.
| Tool | Type | Best for |
|---|---|---|
| Digital tracker app | Software | Progress percentages, stash sync, photo logs |
| Highlighter pens (2 colors) | Analog | Marking completed vs. remaining areas on paper charts |
| Printed pattern binder | Analog | Physical backup and section notes |
| Row counter or tally sheet | Analog | Stitch-by-stitch monitoring on dense patterns |
| Thread inventory catalog | Digital or analog | Preventing mid-project shortages |

Digital tracker apps lead the category for multi-WIP users because they centralize pattern data, progress percentages, and stash records in one place. Integrating stash management with progress tracking in a single app reduces the time you spend switching between systems. That efficiency matters most when you are managing four or five projects simultaneously.
The highlighter technique is the most widely used analog method for paper charts. Using two colors to mark finished and remaining areas prevents stitching errors on large, dense patterns. One color marks what is done; the other flags what is next. The system is simple, costs almost nothing, and works without a phone or tablet.
Physical row counters and printed binders serve as backups when digital access is inconvenient. A binder with tabbed sections for each WIP keeps printed charts, thread lists, and session notes together. Pairing a physical binder with a digital app gives you redundancy, which matters if you ever lose a file or switch devices.
Pro Tip: Install your tracking app to your phone's home screen so it opens in one tap. You are far more likely to update progress immediately after a session if the app is one touch away.
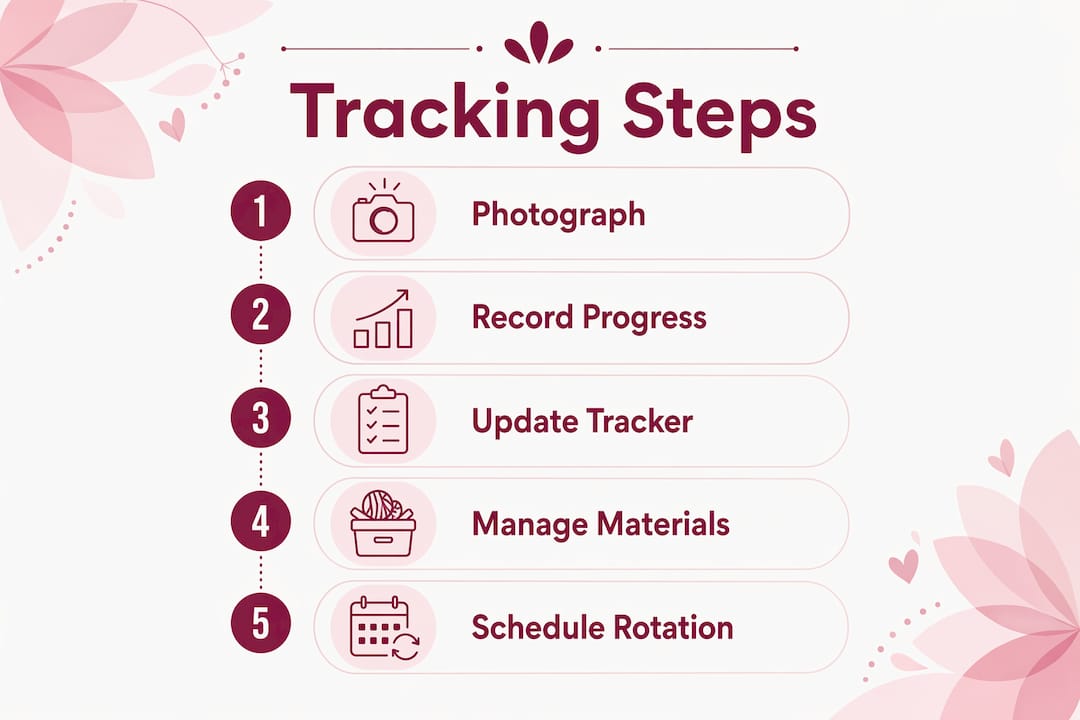
How to build a step-by-step system for managing cross stitch WIPs
A reliable system has six repeatable steps. Skipping any one of them creates gaps that compound over time.
List every active WIP. Write down each project's name, pattern source, fabric count, and the thread colors it requires. This inventory is your master reference. Without it, you are working from memory, which fails.
Assign a tracking method to each project. Large projects with hundreds of colors benefit from section-based tracking. Smaller motifs work well with color-by-color marking. Adjusting tracking granularity to project size keeps the system accurate without becoming tedious.
Set a small, specific goal for each session. "Finish the blue sky section" beats "work on the landscape piece." Specific goals give you a clear stopping point and make it easy to update your tracker the moment you put the needle down.
Update your tracker immediately after stitching. Waiting until the next day introduces errors. Mark completed stitches, note the thread colors used, and record how long you stitched. Session-by-session logs let you estimate realistic completion dates for each WIP, which is especially useful when you are juggling projects with different deadlines.
Photograph progress at fixed milestones. Photos at 25%, 50%, and 75% completion serve as a visual diary and a motivation anchor. When a project feels stalled, a side-by-side comparison of where you started versus where you are now is often enough to keep you going.
Organize digital and physical files by project. Create one folder per WIP, digital and physical, containing the pattern, thread list, and progress notes. This prevents the file-juggling that causes stitchers to lose project-specific information mid-work.
Pro Tip: Match your tracking method to how you naturally stitch. If you work color by color, track by color. If you stitch section by section, track by section. Forcing a mismatched method creates friction that leads to skipped updates.
What mistakes do stitchers make when tracking multiple WIPs?
Most tracking failures come from one of five predictable mistakes. Recognizing them early saves you from restarting projects from scratch.
Overcomplicating the system. A tracker with fifteen fields per session feels thorough on day one and abandoned by day ten. The best system is the simplest one you will actually use every time.
Skipping updates after sessions. Delayed updates lead to miscounts and lost place markers. A dedicated progress tracker only works when it reflects your actual current position, not where you were three sessions ago.
Using multiple apps or methods at once. Switching between multiple tracking tools increases cognitive load and raises the risk of losing project-specific data. Pick one workflow and commit to it.
Ignoring thread inventory. Tracking stitches without tracking supplies means you discover a thread shortage mid-session. Connecting your progress tracker to a thread inventory system closes that gap before it becomes a problem.
Skipping progress photos. Photos are not vanity. They are documentation and motivation. Stitchers who skip them often underestimate how far they have come, which contributes to project abandonment.
"The best progress tracker is the one that maintains continuity from pattern creation through stitching, with minimal friction and no need to switch between systems." Choosing a single integrated workflow for both progress tracking and stash management prevents confusion and keeps every project moving forward.
Pro Tip: Choose one unified workflow that handles both pattern marking and stash management. Flossom, for example, combines thread catalog tracking, WIP photo logs, and shopping list generation in one place, so you never need to cross-reference a separate spreadsheet.
How to tailor your tracking method to each project
Not every WIP needs the same level of detail. Matching your approach to the project saves time and keeps the system sustainable.
Tracking by section works best for large, complex pieces with distinct visual zones, such as a landscape or a portrait. You mark each zone complete when every stitch in it is done. This method reduces the feeling of slow progress on big projects because you reach visible milestones regularly.
Tracking stitch by stitch suits small, intricate motifs where precision matters more than speed. It gives you the most accurate count of remaining work but requires more discipline to maintain. Use it for pieces with tight deadlines or unusual stitch counts.
Tracking by color aligns naturally with how most stitchers work through a pattern. Marking patterns by color also lets you monitor thread consumption in real time, so you know exactly when a color is running low before you hit a shortage mid-session. This method pairs well with a thread inventory tool that flags low stock automatically.
| Project type | Recommended tracking method | Update frequency |
|---|---|---|
| Large, multi-color piece | Section-based | After each section |
| Small motif | Stitch by stitch | Every session |
| Repeat pattern | Color-based | After each color |
| Gift with deadline | Session log + completion % | Every session |
Balancing multiple projects with different priorities also requires a rotation schedule. Assign each WIP a fixed slot in your weekly stitching time. A project that never gets a scheduled slot will stall indefinitely, no matter how good your tracker is. The project time calculator from Flossom helps you estimate how many sessions each piece needs, so you can build a realistic rotation.
Key Takeaways
Tracking multiple cross stitch WIPs requires a single, consistent workflow that connects progress marking, session logging, and thread inventory in one place.
| Point | Details |
|---|---|
| Use one unified system | Combining progress tracking and stash management in one tool prevents errors and lost data. |
| Update immediately after stitching | Same-session updates keep your tracker accurate and your place marker reliable. |
| Match method to project size | Use section-based tracking for large pieces and color-based tracking for standard rotation projects. |
| Photograph at key milestones | Progress photos at 25%, 50%, and 75% completion provide motivation and visual documentation. |
| Integrate thread inventory | Connecting stash records to your WIP tracker prevents mid-project thread shortages. |
Why I stopped fighting my WIP pile and started managing it
I used to treat my WIP pile as a source of guilt. Every unfinished piece felt like a broken promise. The turning point came when I stopped trying to finish projects faster and started tracking them more honestly.
The first thing I did was photograph every active WIP on the same day and write down exactly where I had left off. That single audit took two hours and saved me from restarting three projects I thought were further along than they were. The photos alone changed how I felt about the pile. It went from "evidence of failure" to "proof of work in progress."
What I have found is that the analog and digital methods work best together, not as alternatives. I use highlighted paper charts for the physical satisfaction of marking progress, and I use a digital tracker for stash records and session logs. The thread stash organization side of things used to be completely separate, which meant I regularly ran out of a color mid-project. Integrating inventory with progress tracking fixed that almost immediately.
The hardest lesson was accepting that a simple system I actually use beats a perfect system I abandon. If your tracker has more than five fields to fill in per session, it will not survive contact with a real stitching habit. Keep it light, keep it consistent, and let the photos do the motivational heavy lifting.
— Simone
Flossom makes multi-WIP tracking less of a chore
Stitchers who juggle several projects at once need a tool that handles progress tracking and thread inventory without requiring two separate apps or a spreadsheet.

Flossom is built specifically for that workflow. You can upload pattern PDFs, log WIP progress with photos, set low-stock alerts on your thread stash, and auto-generate shopping lists based on what your patterns need versus what you already own. The free tier covers DMC and Anchor catalogs with up to 3 projects. Pro unlocks all 71 thread brands, a camera color picker, a barcode scanner, fabric stash tracking, and unlimited projects. Everything syncs across devices and exports to CSV. Visit Flossom to see how it handles the organizational side of cross stitch so you can focus on the stitching itself.
FAQ
What is a cross stitch WIP tracker?
A cross stitch WIP tracker is any system, digital or physical, that records each project's current progress, thread usage, and position in the pattern. It prevents counting errors and helps stitchers resume work accurately after a break.
Why should I track cross stitch progress across multiple projects?
Tracking progress reduces miscounts, prevents project abandonment, and gives you realistic completion estimates for each piece. Without a record, rotating between projects almost always leads to lost place markers and repeated stitching.
What is the best method for tracking large cross stitch projects?
Section-based tracking is the most effective method for large projects. Marking each visual zone complete gives you regular milestones and reduces the feeling of slow progress on pieces that take months to finish.
How often should I update my cross stitch tracker?
Update your tracker immediately after every stitching session. Same-session updates are the single most reliable way to keep your progress records accurate and your place marker trustworthy.
Can I track thread supplies and WIP progress in the same tool?
Yes, and doing so is the recommended approach. A unified workflow that connects stash inventory with progress tracking prevents thread shortages and eliminates the need to switch between multiple apps or spreadsheets.
Recommended
We make Flossom — the calm app for cross-stitchers and embroiderers who want their stash, projects, fabric and shopping list in one tidy place.