One Page Cross Stitch Project Checklist for Stitchers
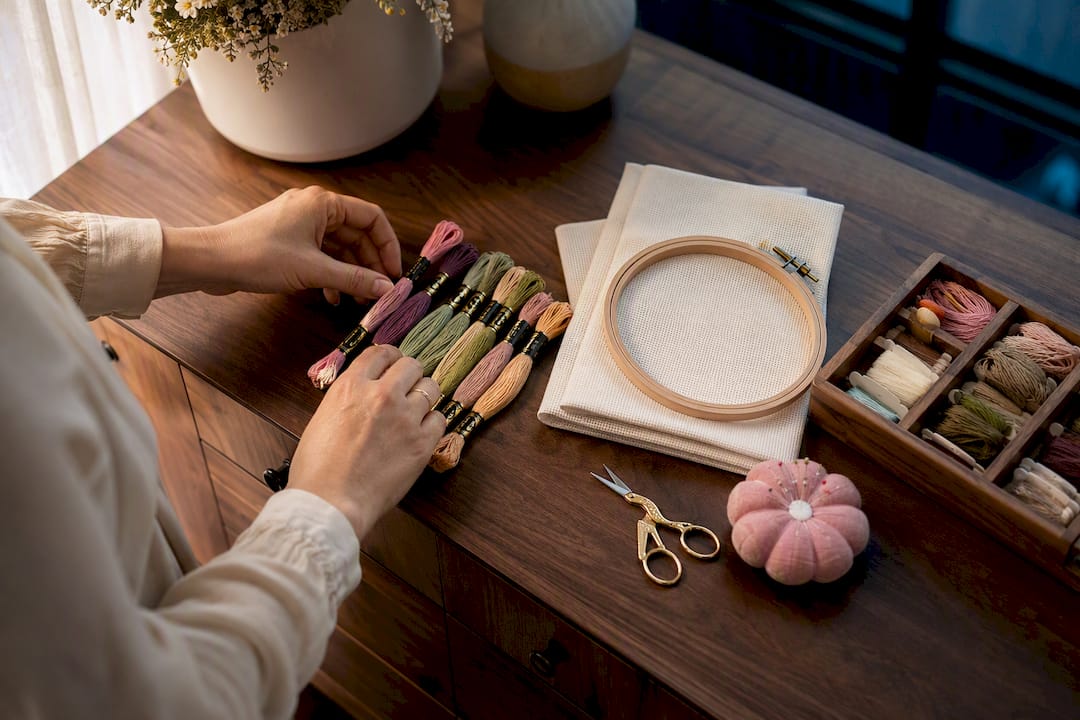
One Page Cross Stitch Project Checklist for Stitchers ! Hands organizing a cross stitch project kit Gather your fabric, floss, needle, hoop, scissors, and pattern before you thread a single stitch.
One Page Cross Stitch Project Checklist for Stitchers
Gather your fabric, floss, needle, hoop, scissors, and pattern before you thread a single stitch. Check your stash first, then wash and cut fabric with a 2-inch margin on every side, find the center, and hoop it drum-tight. Budget 6 to 15 hours for a typical first project, and plan three or four short sessions rather than one marathon sitting.
TL;DR:
- Most beginner cross stitch projects require 6 to 15 hours, with stitch counts around 2,000 and an average speed of 200 to 400 stitches per hour.
- Use a 14-count Aida fabric, a size 24 tapestry needle, and a 6 to 7 inch hoop for optimal tension and ease of stitching.
- Accurate fabric cutting involves dividing the pattern's stitch count by fabric count, then adding four inches for margins and hooping room.
- Centering fabric and pattern ensures the design fits properly, prevents running out of space, and maintains stitch accuracy.
- Proper organization of supplies, including labeling bobbins and storing patterns, is essential for efficient progress and project preservation.
Table of Contents
- Building Your Cross Stitch Supplies List
- How Do You Calculate and Cut Your Fabric?
- Finding the Center of Your Fabric and Chart
- Sorting Floss and Choosing the Right Needle
- Hooping Your Fabric for Even Tension
- Anchoring Stitches and Keeping Direction Consistent
- How Long Will Your First Project Take?
- Keeping Your Kit Organized Between Sessions
- What to Do With Your Fabric Once the Stitching Is Done
- Why Planning Beats Winging It
- Turn This Checklist Into a Digital Workflow With Flossom
- Sources
Building Your Cross Stitch Supplies List
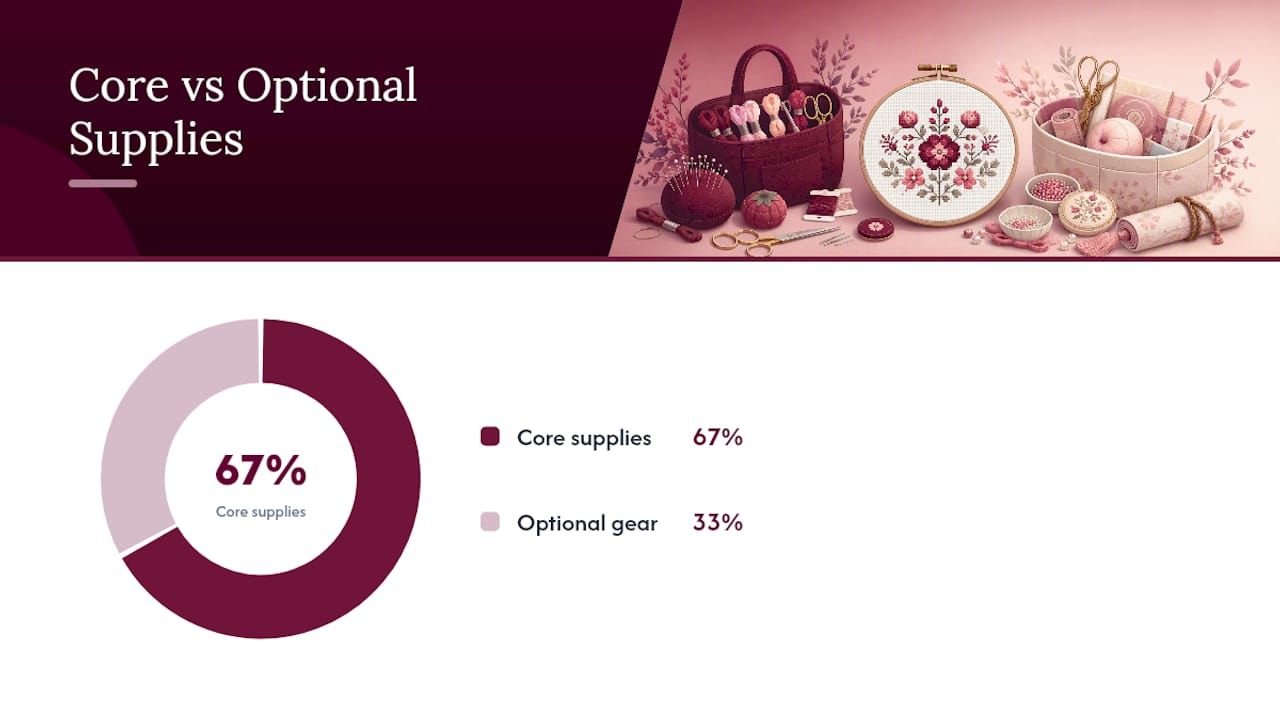
Every finished piece traces back to the same six items. Miss one and you either stop mid session to dig through a drawer or, worse, drive to the craft store in your slippers.
Here's the core kit, plus why each piece matters:
- Pattern (chart): Confirms stitch count, colors, and symbol key before you cut anything.
- Fabric: Aida cloth in 14 count is the standard beginner surface because the holes are large enough to see clearly without a magnifier.
- Floss: DMC and Anchor are the two most common brands, each using its own numbering system for colors.
- Tapestry needle: A blunt tip slides between fabric threads instead of splitting them.
- Hoop or frame: Holds tension so stitches sit flat instead of puckering.
- Small sharp scissors: Embroidery scissors with a fine point trim floss tails close to the fabric without snagging.
Optional gear speeds things up but isn't required for a first project: a needle minder keeps your needle from vanishing into the couch cushions, a daylight lamp cuts eye strain during evening sessions, and floss bobbins stop skeins from turning into a tangled mess in your project bag.
Before buying anything, check what you already own. Pull your stash and match it against the pattern's color key, because starter guides commonly recommend 14 count Aida with two strands of floss as the default setup, and you may already have half the colors a new chart calls for. A cataloging checklist helps you confirm exactly what's sitting in your bins before you add anything new to the pile.
How Do You Calculate and Cut Your Fabric?
Fabric size comes from a simple formula: divide your pattern's stitch count by the fabric count, then add 4 inches total, 2 inches of margin on each side. A design that's 100 stitches wide on 14-count Aida needs about 7.1 inches of stitched space (100 ÷ 14), so you'd cut an 11-inch-wide piece to leave room for hooping and finishing.
Here's the process step by step:
- Find your pattern's stitch count (width and height, listed on the chart).
- Divide each dimension by your fabric count to get the stitched area in inches.
- Add 2 inches to every side, 4 inches total in each direction.
- Cut fabric to that final size using sharp fabric shears, never paper scissors.
For small patterns under 50 stitches, a fat quarter (roughly 18 by 21 inches) usually covers the project with plenty of margin left for framing later. Once cut, seal the raw edges so they don't fray during weeks of handling. Masking tape is fast and free but can leave residue if left on too long. Fray Check dries clear and permanent but takes a few minutes to set. A zig-zag stitch on a sewing machine is the most durable option if you have one handy.
Pro Tip: Cut fabric a size up if you're unsure about your final design placement. Extra margin costs you nothing, but running out of fabric mid-project means starting over.
Finding the Center of Your Fabric and Chart
Fold your fabric in half, then in half again. The point where the creases cross is your fabric's exact center. Mark it with a dissolvable pen or a single loose stitch you'll remove later, according to a step-by-step centering method built around this same fold-and-crease approach.
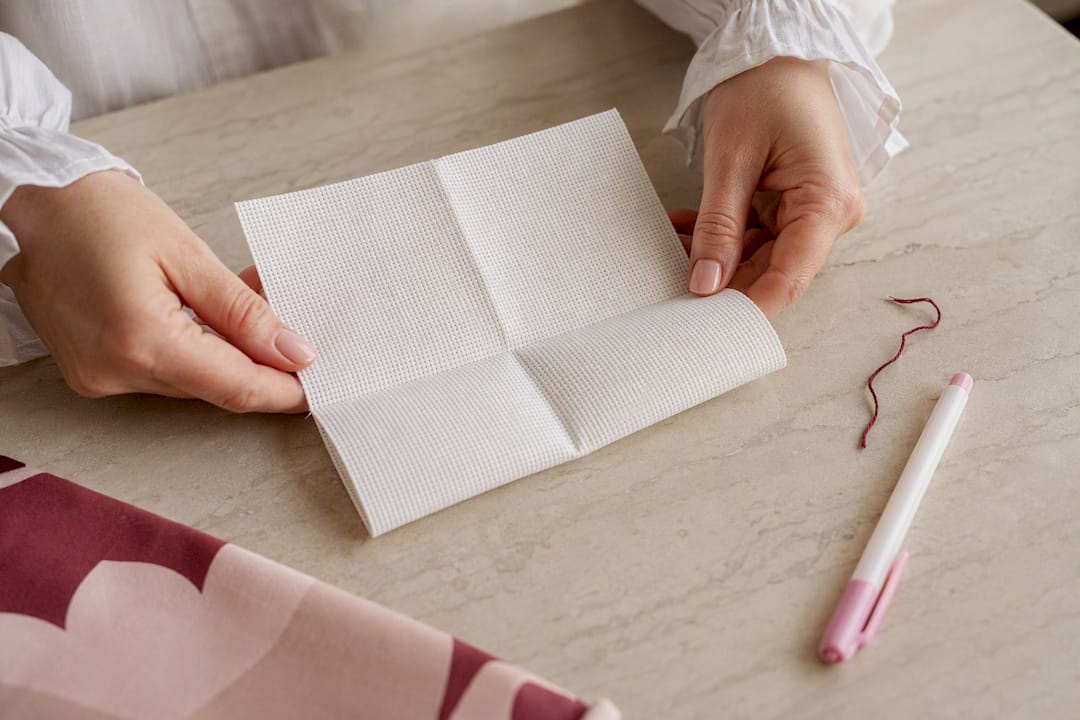
Your pattern has a matching center point too, usually marked with arrows along the edges of the chart pointing toward the middle. Line up your fabric's crease with that chart center before you place your first stitch.
Why bother with this extra step instead of just starting at a corner?
- Starting at center guarantees the design fits within your cut fabric, no matter which direction it grows.
- It prevents the frustrating discovery, three hours in, that you've run out of room on one edge.
- It keeps your stitch count accurate, since counting errors compound the farther you get from a known reference point.
Sorting Floss and Choosing the Right Needle
Read through your pattern's color key and write down every floss number it calls for. Compare that list against your stash, then build a shopping list for anything missing rather than buying the whole palette fresh.
When you're ready to stitch, pull floss from the end marked with the brand label, not the loose end, since that keeps the skein from tangling as you unwind it. Cut a strand about 18 inches long, then separate it thread by thread rather than pulling out two or three strands at once. Separating one strand at a time removes the twist that causes floss to knot on the back of your work.
For 14-count Aida, two strands is the standard for full coverage without bulk. Bump up to three strands on darker colors if the fabric shows through, since deeper hues tend to need slightly denser coverage to look solid.
Needle size follows fabric count directly. A size 24 tapestry needle is the standard match for 14-count Aida, and the Embroiderers' Guild of America lists it alongside the hoop and floss as part of the essential starter kit.
By the numbers: A typical first cross stitch project runs several hours of stitching time, built around a core kit of 14-count Aida, a size 24 tapestry needle, and a 6 to 7 inch hoop.
A shopping list workflow built from your pattern's color key keeps you from grabbing three skeins of the same DMC number you already own.
Hooping Your Fabric for Even Tension
A 6 to 7 inch hoop suits most beginner projects and keeps the fabric taut without stretching it out of shape, matching the sizing the Embroiderers' Guild of America recommends for standard first pieces. Loosen the outer ring, lay your fabric flat with the marked center inside the hoop, press the inner ring down, then pull the fabric edges evenly before tightening the screw.
You want the fabric "drum tight," meaning a light tap produces a taut, even sound with no give.
- Check tension by pressing gently on the fabric; it should barely move.
- Rotate the hoop and check all four sides for even pull, not just the top.
- Avoid cranking the screw so tight that the weave distorts, since overstretched Aida can warp your stitch count permanently.
Larger projects outgrow a hand hoop fast. A lap frame or scroll frame works better for pieces wider than 10 inches because it holds tension across a bigger surface without you needing to re-hoop and shift the design repeatedly. Q-snap frames are a middle option, lightweight and adjustable for medium-sized charts that don't need a full floor stand.
Anchoring Stitches and Keeping Direction Consistent
Skip the knot. Knots create lumps on the back of your work that show through on lighter fabric and make future stitches sit unevenly. Instead, use one of two anchoring methods:
- Loop start (for even numbers of strands): fold floss in half, thread the loop end, and catch it under your first stitch to lock it in place.
- Away waste knot or trapped tail: leave about a 2-inch tail on the back and stitch over it for the first four or five stitches to secure it without a knot.
Once you're stitching, keep every top stitch leg facing the same direction across the whole piece. The Embroiderers' Guild of America's technique guidance treats this as one of the ten essential rules for a clean finish, and it's the single fastest way to tell a beginner piece from a polished one at a glance.
Cut floss to roughly 18-inch lengths. Longer strands fray and thin from repeated pulling through fabric, weakening the color partway through a section. If a color needs to travel more than an inch across the back to its next spot, end the thread and restart instead of carrying it, since long floats show through as shadows on the front.
Pro Tip: Flip your work over every 20 minutes or so and glance at the back. Catching a tangle or a stray float early takes ten seconds; unpicking a whole section later costs you an evening.
How Long Will Your First Project Take?
A typical first cross stitch project takes 6 to 15 hours from empty hoop to final stitch, a range the Embroiderers' Guild of America uses as its baseline for beginner-sized patterns. Where you land in that range depends on stitch density, floss changes, and how often you're counting squares versus following muscle memory.
You can build your own estimate with a simple ratio: total stitch count divided by your expected stitches per hour. New stitchers often average somewhere between 200 and 400 stitches an hour depending on pattern complexity, so a 2,000 stitch design might run anywhere from 5 to 10 hours before finishing touches.
- Plan 3 to 4 sessions for a small beginner project rather than one long sitting.
- Log your stitch count or hours after each session so your estimate sharpens as you go.
- A project time tracker turns a raw stitch count into a realistic finish date instead of a guess.
Planner templates built specifically for cross stitch kitting let you log materials, costs, and hours side by side, which matters more the second and third time you sit down to a project that's been shelved for a month.
Keeping Your Kit Organized Between Sessions
A project that sits half finished for six weeks only survives intact if you can find every piece of it when you come back. Label your floss bobbins with the brand and number, and keep loose skeins bagged rather than floating free in a bin where they'll knot together.
For short breaks, a dedicated project bag with your fabric, pattern printout, and current needle keeps everything in one grab-and-go spot. For longer storage, clear labeled containers in a low-humidity space protect fabric from yellowing and floss from fading.
- Store a paper or digital copy of the pattern with the project, not just on your computer somewhere else.
- Write down fabric count, brand, and any color substitutions you made, since memory fades faster than you'd expect over a few months.
- A stash organization system keeps floss sorted by brand and number so restarting a shelved project doesn't mean re-sorting a pile of loose skeins first.
Keeping a project log, whether on paper or in an app, is one of the simplest habits that separates stitchers who finish multiple pieces a year from those who lose track of what they own and buy the same DMC 310 three times.
What to Do With Your Fabric Once the Stitching Is Done
Wash finished pieces gently in cool water with a mild soap if there's any hoop residue or hand oil on the fabric, then roll it in a towel to remove excess moisture rather than wringing it. Iron face down on a padded surface, since ironing directly on the stitched side can flatten and shine the floss.
From there, you've got three basic finishing routes:
- Framing: best for gift pieces or anything meant to hang on a wall long term.
- Hoop display: fast, low cost, and works well for smaller designs where the hoop itself becomes part of the presentation.
- Sewing into an item: pillows, bags, and ornaments give a finished piece a functional second life beyond wall art.
Each of those paths has its own set of tools and techniques worth a deeper look once you're past the planning stage and staring at a finished piece.
Why Planning Beats Winging It
Stitchers who skip the planning step almost always pay for it later, usually around hour eight of a project when they realize they're one skein short of DMC 3799 with no backup plan. Treating preparation as part of the craft itself, not a chore before the "real" stitching starts, changes how the whole project feels.
Logging what you used after finishing a piece matters just as much as prepping before you start. A short note on fabric count, floss substitutions, and total hours turns your next project into an easier one, because you're no longer guessing at your own pace or restocking blind.
That habit of reflection is what separates a stitcher who finishes three projects a year from one who finishes ten. The checklist gets you started clean. The log is what makes every project after the first one faster.
— Simone
Turn This Checklist Into a Digital Workflow With Flossom
This checklist can be turned into a workflow you don't have to rebuild from memory every time. Upload your pattern PDF, and the app compares its color key against your cataloged stash, then auto-generates a shopping list for only the floss you're actually missing, no more guessing what's in the bin.

A free tier covers DMC and Anchor floss with unlimited stash tracking across three projects, while a paid tier adds more supported thread brands, a camera color picker, barcode scanning, and fabric stash tracking on top of unlimited projects. Projects sync across devices, so the WIP you started on one device shows up on another at your next stitching session, photos and all. If you want a realistic finish date before you cut your first piece of fabric, run your stitch count through the project time calculator and see where your hours actually land. Browse the full set of planning tools and start your next project with a shopping list built from what you already own.
Sources
- Embroiderers' Guild of America
- How to find the centre of your cross stitch fabric
- Cross stitch for beginners: starter guide 2026 | Stitchi Studio
Recommended
We make Flossom — the calm app for cross-stitchers and embroiderers who want their stash, projects, fabric and shopping list in one tidy place.