Cross Stitch Kit Contents Checklist for Stash Cataloging
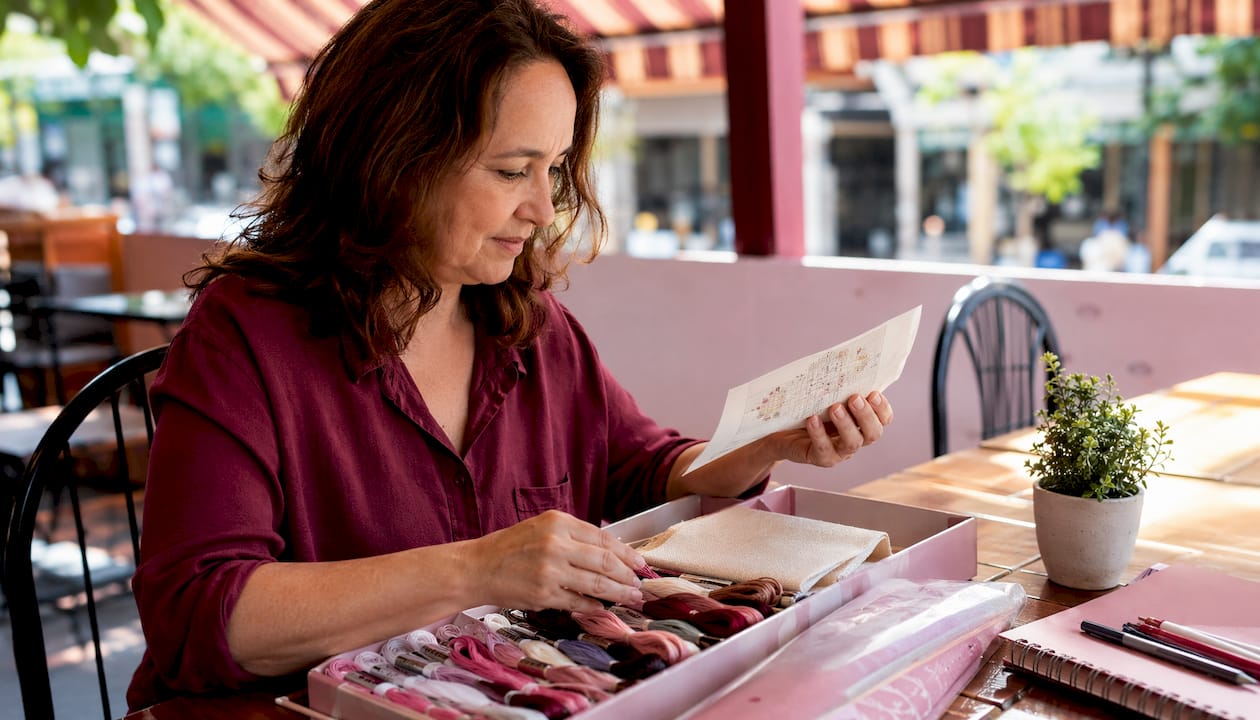
Cross Stitch Kit Contents Checklist for Stash Cataloging ! Woman checking new cross stitch kit contents Every cross stitch kit should arrive with seven things: a pattern, fabric (with count noted), all floss skeins with brand and numeric codes, at least one needle, a hoop or frame, a legend, and instructions.
Cross Stitch Kit Contents Checklist for Stash Cataloging
Every cross stitch kit should arrive with seven things: a pattern, fabric (with count noted), all floss skeins with brand and numeric codes, at least one needle, a hoop or frame, a legend, and instructions. Check those items the moment the box opens, then record them into your digital stash or add anything missing to your shopping list before you put the kit down.
On arrival, verify each of these:
- Pattern (paper chart or PDF link)
- Fabric: type (Aida, linen, evenweave), count (e.g., 14-count), and cut dimensions
- Floss skeins: brand (DMC, Anchor, etc.), numeric code, color name if labeled, and quantity
- Needles: type (tapestry/blunt) and size(s) included
- Hoop or frame: diameter and material
- Legend/key and printed instructions
- Specialty threads, beads, or embellishments (if any)
Pro Tip: Photograph the legend before you touch anything else. That single photo becomes your reference for every substitution and shopping-list entry you'll ever make for this project.
Table of Contents
- Why recording kit contents the moment they arrive saves you money
- The complete cross stitch kit contents checklist: what to inspect and record
- What fabric count and strand usage mean for your project records
- How to handle brand substitutions when cataloging or shopping
- Step-by-step: entering kit items into your stash app or spreadsheet
- Which kit components belong in your reusable stash
- What to do when items are missing, wrong, or damaged
- CSV-ready fields for importing kit data into a stash app
- Key Takeaways
- Why recording DMC codes first is the habit that actually sticks
- Flossom turns your kit checklist into a live shopping list
- Further reading and source notes
Why recording kit contents the moment they arrive saves you money
Recording on receipt does three things at once: it prevents duplicate purchases, makes project planning predictable, and lets a stash app generate a shopping list in seconds instead of minutes of manual cross-referencing. That last point matters more than it sounds. If you're juggling multiple works in progress, you need to know whether you already own DMC 3865 before you order another skein, not after it arrives.
Kit-provided materials are not always top quality. Experienced stitchers often source individual components for better thread or fabric control, which means the brand and code you record today may become the benchmark for a better replacement tomorrow. A kit that costs roughly $25–$40 typically includes reusable components, so tracking what you already own directly reduces what you spend on the next project.
Pro Tip: Log the kit as a single unit in your stash app before separating the components. That way, the pattern, fabric, and threads stay linked in your records even after you've wound the floss onto bobbins.

The complete cross stitch kit contents checklist: what to inspect and record
Work through this list item by item. For each entry, mark it OK, MISSING, or SUBSTITUTE so your stash record is audit-ready from day one.
Pattern
- Pattern name and any ID or SKU
- Format: paper chart, color-printed PDF, or stamped fabric
- Stitch count (width × height in stitches)
- Finished size at the kit's stated fabric count
Fabric
- Type: Aida, linen, or evenweave
- Count (stitches per inch)
- Cut dimensions in inches
- Color
- Note whether the kit is counted or stamped — stamped kits use water-soluble ink printed on the fabric, which affects finishing and requires colorfast floss
Floss
- Brand (DMC, Anchor, or other)
- Numeric code for each color
- Color name if the legend includes one
- Number of skeins or grams per color
Needles
- Type: tapestry (blunt tip) — blunt tapestry needles part fabric threads rather than pierce them, preventing damage and tension issues
- Size(s) included
Hoop/frame
- diameter of the hoop
- Material (wood, plastic, metal)
Instructions and legend
- Printed color key present?
- Stitch guide included?
Extras
- Specialty threads (metallic, silk)
- Beads or charms
- Backing or finishing fabric
| Item | Status | Notes |
|---|---|---|
| Pattern/chart | OK / MISSING | Note format (counted vs. stamped) |
| Fabric | OK / MISSING / SUBSTITUTE | Record count, dimensions, color |
| Floss (per color) | OK / MISSING / SUBSTITUTE | Brand, code, qty |
| Needle(s) | OK / MISSING | Size and type |
| Hoop/frame | OK / MISSING | Size and material |
| Legend/instructions | OK / MISSING | Photograph immediately |
| Extras | OK / MISSING | List each item |
What fabric count and strand usage mean for your project records
Record the fabric count and the pattern's stitch count together — those two numbers let you calculate finished dimensions precisely, and they're the first thing any stash app needs to generate accurate material estimates.
Fabric count refers to stitches per inch. A Aida fabric count indicates the number of stitches per inch; a 28-count evenweave stitched over two threads produces the same stitch density. Higher counts yield smaller, more detailed stitches; lower counts (6- or 11-count) are easier to see and better for beginners. To find finished size, divide stitch width by fabric count for width in inches, and do the same for height.
Floss is 6-strand cotton by default. Most patterns call for 2 strands for full cross stitches on 14-count Aida and 1 strand for backstitch. Record the strand count exactly as the instructions state it, because changing it changes thread consumption and coverage. If the kit doesn't specify, note that too — it's a gap you'll want to fill before you start stitching.
Pro Tip: Log fabric count and finished size in the same record field. "14-count Aida, 120×90 stitches, 8.5×6.4 inches finished" is one line that answers every planning question at once.
How to handle brand substitutions when cataloging or shopping
Always record the original brand and numeric code first. Conversions come second, and only when the exact code is unavailable. A DMC code is a universal reference point; an Anchor equivalent is a workaround.
When you do record a substitution, capture three things: the original brand and code, the substitute brand and code, and a one-line reason ("equivalent shade," "out of stock," "cheaper per skein"). For large projects with shaded gradients, exact codes matter enough that a close substitute can visibly shift the finished piece. For small motifs or solid fills, a documented near-match is perfectly acceptable.
Pro Tip: Flossom converts between 55 thread brands, so you can record the original DMC code and let the app find the Anchor or other equivalent automatically, rather than hunting conversion charts manually.
Step-by-step: entering kit items into your stash app or spreadsheet
Work in this order so nothing gets missed:
- Photograph the legend and attach it to the kit record.
- Create a new kit entry with the pattern name, pattern ID, and stitch count (width × height).
- Add the fabric: type, count, cut dimensions, and finished size.
- Add each thread: brand, numeric code, color name, skein quantity, and strand usage note.
- Add tools: needle size(s), hoop diameter and material.
- Add extras: specialty threads, beads, embellishments.
- Set a status for each item (OK, MISSING, SUBSTITUTE).
- Run a supply audit to flag missing items and push them to your shopping list.
The legend photo is the most important attachment in the record. It lets you match colors visually when a code is ambiguous, and it's the fastest way to verify a substitution without unpacking the whole kit.
For a spreadsheet, use one row per thread color and one header row per kit. Keep fabric and tool data in a separate tab or in the top rows of the kit sheet. That structure maps directly to a CSV import.
Pro Tip: Track multiple WIPs by linking each kit record to its project entry. When you pause a project, the kit record tells you exactly where you left off and what you still need.
Which kit components belong in your reusable stash
Keep anything that will outlast the project: high-quality hoops, unopened floss, needles in good condition, and any backing fabric. Treat low-quality plastic hoops and single-use extras as optional additions.
- Floss: Label each skein with the kit name and pattern ID before winding onto bobbins. Store in an airtight container to prevent dust and humidity damage.
- Needles: Needle sizes 20–28 cover most fabric counts. Keep a range and log each size in your stash so you know what you own.
- Hoops: Some kit producers now sell tiers that exclude hoops for repeat stitchers who already own them. Track hoop size and material in your stash to avoid accumulating duplicates.
- Fabric: Store Aida folded with acid-free tissue or rolled to prevent creases. Log the count, color, and remaining dimensions after cutting.
Pro Tip: Add leftover floss from a finished kit to your thread stash immediately, not later. "Later" is where partial skeins go to disappear.
What to do when items are missing, wrong, or damaged
Check, photograph, contact, then shop. In that order.
- Check: Compare every item against the kit's printed contents list.
- Photograph: Document the issue before contacting the supplier — a photo of a missing skein slot or a damaged hoop is your fastest path to a replacement.
- Contact the supplier: Most kit makers will replace missing or wrong items if you reach out within a reasonable window.
- Add to shopping list: If you can't wait, add the missing item with its exact brand and code so you buy the right thing.
For floss, check colorfastness on arrival if the kit is stamped. Wet a small piece of each color against a white cloth; if dye transfers, don't use it until you've sourced a colorfast alternative. For fabric, hold it up to light and check for holes, thin spots, or off-grain cuts before you start stitching.
Pro Tip: Record the issue in the kit's notes field with a date. If the same supplier has a recurring problem, that note becomes useful context for your next purchase decision.
CSV-ready fields for importing kit data into a stash app
A standardized schema means your shopping-list generator and stash app read the data without reformatting. Use DMC numeric codes for thread where available, quantities in skeins, and dimensions in inches.
| CSV Field | Description |
|---|---|
| kit_id | Unique identifier for the kit |
| pattern_name | Full pattern title |
| stitch_width | Width in stitches |
| stitch_height | Height in stitches |
| fabric_type | Aida, linen, evenweave |
| fabric_count | Stitches per inch (e.g., 14) |
| fabric_width_in | Cut width in inches |
| fabric_height_in | Cut height in inches |
| finished_width_in | Calculated finished width |
| finished_height_in | Calculated finished height |
| thread_brand | DMC, Anchor, etc. |
| thread_code | Numeric code |
| thread_color_name | Color name from legend |
| thread_qty | Number of skeins |
| needle_size | Size(s) included |
| hoop_size | diameter of the hoop |
| kit_type | Counted or stamped |
| extras | Beads, specialty threads, etc. |
| photo_url | Link to legend photo |
| status | OK / MISSING / SUBSTITUTE |
| notes | Substitution reason or issue log |
Key Takeaways
A complete cross stitch kit contents checklist covers pattern, fabric with count, all floss codes and quantities, needles, hoop, and legend — record every field into your stash on arrival to prevent duplicate purchases and enable instant shopping-list generation.
| Point | Details |
|---|---|
| Verify seven core items | Check pattern, fabric, floss, needles, hoop, legend, and extras before anything else. |
| Record brand and numeric code | Log the original DMC or Anchor code first; substitutions are secondary entries. |
| Photograph the legend | Attach the photo to your kit record for fast color matching and substitution checks. |
| Use the CSV schema | Standardized fields (thread_brand, thread_code, fabric_count, status) ensure clean imports into any stash app. |
| Flossom automates the audit | Enter kit data into Flossom and it compares your stash against pattern needs to generate a shopping list automatically. |
Why recording DMC codes first is the habit that actually sticks
The conventional advice is to "organize your kit before you start stitching." That's fine as far as it goes, but it misses the real bottleneck: the moment you separate a skein from its band, you've lost the code unless you wrote it down first. Numeric codes are the only reliable link between a physical thread and every conversion chart, shopping site, and stash app you'll ever use. Color names are decorative. "Ecru" means something different to every brand. "3865" means exactly one thing.
The habit worth building is this: photograph the legend, then record every code before you touch the floss. Keep the kit as a single unit while you audit it into your stash. That ten-minute discipline at the start of a project saves an hour of squinting at half-wound bobbins later, trying to remember whether that pale gold is 676 or 677.
Flossom turns your kit checklist into a live shopping list
Once you've worked through a kit checklist, the next step is making that data work for you. Flossom is built for exactly this: you enter the kit's pattern, fabric count, and thread codes, and it compares what you've logged against your existing stash to flag what's missing. No manual cross-referencing.

The free tier includes the full DMC and Anchor catalogs with unlimited stash entries and three active projects. Pro adds all 55 brand libraries, a camera color picker, barcode scanner, fabric stash tracking, and CSV export so your kit records move cleanly between Flossom and any spreadsheet. Every record syncs across devices and stays ad-free.
After you've logged your kit, use the project time calculator to estimate how long the stitch count will actually take, then decide whether to start now or queue it behind a current WIP. That's the full workflow: verify, record, audit, plan.
Start cataloging your kit at Flossom — the free tier is enough to get your first kit fully logged and your shopping list generated today.
Further reading and source notes
- DMC — Explore cross stitch: Primary reference for fabric count definitions and Aida guidance.
- The Cross Stitch Guild — Cross stitch equipment: Authoritative guidance on needle types, sizes, and fabric handling.
- Cross Stitch Boutique — Supplies for beginners: Practical strand-usage guidance for 14-count Aida.
- Innocent Bones — What's included in a cross stitch kit: Covers legend photography and color verification workflow.
- AIMDIY — How to use a stamped cross stitch kit: Explains stamped vs. counted kit differences and colorfastness considerations.
- Flossom Blog — How to organize a cross-stitch thread stash: App-focused workflow for organizing and cataloging floss from kits.
- Flossom Blog — Essential cross stitch tools list: Beginner tool reference for verifying kit contents against standard requirements.
Recommended
We make Flossom — the calm app for cross-stitchers and embroiderers who want their stash, projects, fabric and shopping list in one tidy place.