
Bullion Knot Explained: Quick How-To for Stitchers
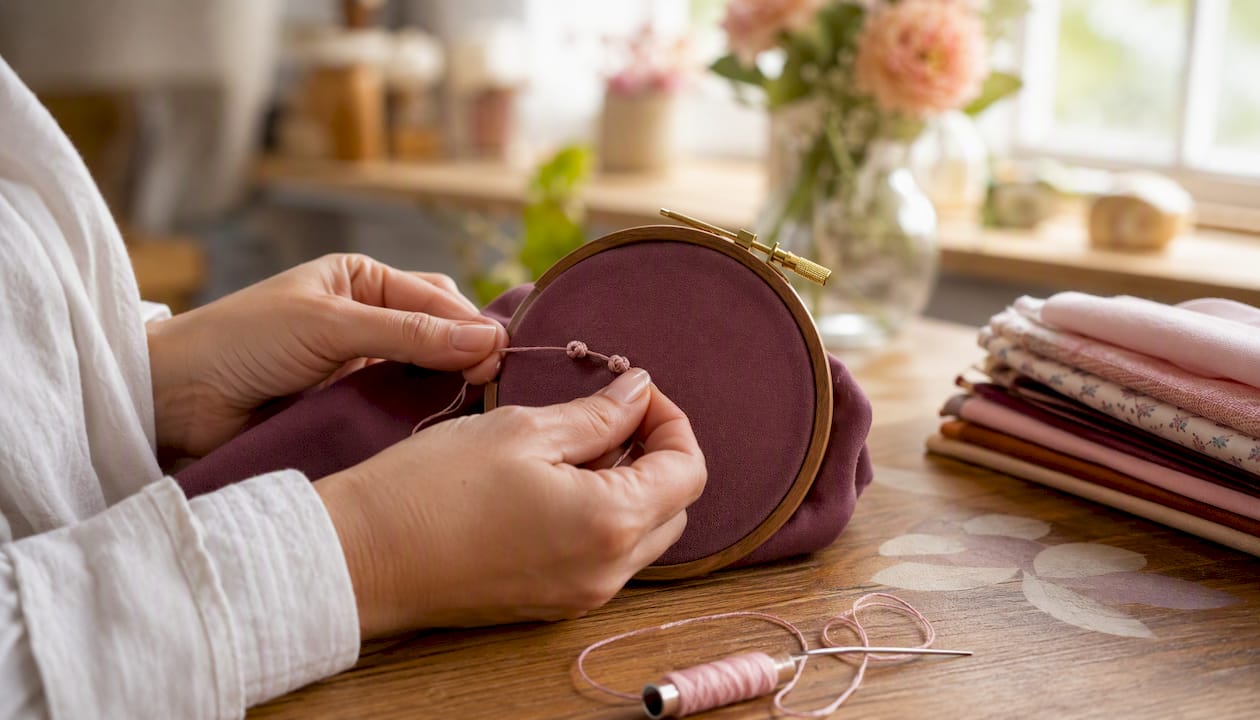
Bullion Knot Explained: Quick How-To for Stitchers ! Hands tying bullion knot embroidery stitch A bullion knot is a raised, tube-shaped stitch formed by wrapping thread around the needle multiple times and pulling the coil flat against the fabric.
Bullion Knot Explained: Quick How-To for Stitchers
A bullion knot is a raised, tube-shaped stitch formed by wrapping thread around the needle multiple times and pulling the coil flat against the fabric. The single most important thing you can do before your first attempt is to swap in a milliner's needle. Here is the three-step core of the technique:
- Bring your needle up at A, insert it down at B (your stitch length), then bring the tip back up at A without pulling the needle all the way through.
- Wrap the working thread around the needle shaft evenly until the coil length matches the A–B distance.
- Hold the coil lightly with your thumb and forefinger, pull the needle through slowly, then take the thread back down at B to anchor.
Resources like the RSN StitchBank, Pintangle, and Flossom's project-planning tools each approach the bullion knot from a different angle, but they all agree on one thing: needle choice makes or breaks the stitch.
Key Takeaways
A milliner's needle, matched wrap count, and a relaxed pull-through grip are the three factors that determine whether a bullion knot succeeds or fails.
| Point | Details |
|---|---|
| Use a milliner's needle | Its uniform shaft prevents the coil from jamming at the eye during pull-through. |
| Match wraps to stitch length | Count wraps until the coil equals the A–B gap; too many wraps cause curling. |
| Wrap clockwise for most threads | S-twisted floss like DMC stays smooth with clockwise wraps; counterclockwise untwists it. |
| Rub the belly to fix lumps | Slide the needle under the finished bullion and rub gently to align uneven coils. |
| Flossom tracks your practice | Upload swatch photos and log thread choices in Flossom to build a record of your progress. |
Table of Contents
- What exactly is a bullion knot?
- When does a bullion knot work best?
- What tools and materials do you need?
- How to tie a bullion knot, step by step
- How many wraps, and which direction?
- Troubleshooting common bullion knot problems
- Bullion knot variations worth knowing
- Practice drills that build real fluency
- Why needle choice and tension actually matter
- An honest note on learning this stitch
- Flossom helps you plan and track bullion projects
- Sources
What exactly is a bullion knot?
A bullion knot is a wrapped coil stitch: thread winds around the needle to create an elongated, raised tube that sits on top of the fabric rather than lying flat like a satin stitch. The RSN StitchBank documents historical use in English embroidery and Italian cutwork from at least the 16th century, which means this stitch has been tested across centuries of needlework traditions.
You will encounter it under several names depending on the source, region, or tradition:
| Name | Notes |
|---|---|
| Bullion stitch | Most common alternate label |
| Coil stitch | Describes the wrapped structure |
| Caterpillar stitch | Named for its segmented look |
| Worm stitch | Regional/informal name |
| Post stitch | Used in Brazilian embroidery |
| Grub knot | British traditional term |
| Porto Rico rose | When arranged in a floral cluster |
The TRC Leiden needlework database lists several of these regional names, so if a pattern or tutorial uses "grub knot" or "worm stitch," you are looking at the same technique.
When does a bullion knot work best?
The bullion knot earns its place whenever you need texture that stands off the fabric surface. Its most common uses in embroidery:
- Rosebuds and petals: Short bullions with a few wraps curve naturally into tight buds; longer ones fan out into open petals.
- Pistils and flower centers: Clusters of a few short bullions radiating from a center point mimic stamens convincingly.
- Berries and seeds: A single plump bullion with extra wraps reads as a berry when worked in a tight oval.
- Textured fills: Rows of parallel bullions, staggered like brickwork, create a dense, tactile surface.
- Border accents: Long bullions along a hem or frame add a dimensional ridge.
- Brazilian 3D embroidery and stumpwork: Both traditions use bullions heavily for raised floral elements.
Scale matters. Short bullions (under 6 wraps) stay compact and work for fine details. Longer ones, with 10 or more wraps, create flat, arching, or tubular effects depending on how tightly you hold the coil during pull-through. The Simply Sewing step-by-step project tutorial shows how short and long bullions combine into small decorative hangings, which is a useful mental model for planning a mixed-motif piece.
What tools and materials do you need?
Getting the right needle is more than half the battle. Here is what to gather before you start:
| Tool / Material | Why it matters for bullion knots |
|---|---|
| Milliner's (straw) needle | Uniform shaft diameter from point to eye; the coil slides off without catching |
| Standard embroidery needle | Tapered eye catches the coil and jams — avoid for bullions |
| DMC stranded cotton (2–3 strands) | Consistent S-twist; wraps evenly and pulls through cleanly |
| Rayon or silk thread | Slippery and looser twist; requires extra care with wrap direction |
| Specialty/metallic thread | Adds sheen but can kink; use a single strand and wrap loosely |
| Tightly woven fabric (linen, cotton) | Holds the anchor points firmly so the stitch doesn't distort |
| Embroidery hoop or Q-snap | Keeps fabric taut for two-handed work; frees your non-dominant hand to hold the coil |
The milliner's needle deserves a closer look. Unlike a standard embroidery needle, its shaft and eye share the same thickness, so the wrapped coil passes over the eye without snagging. That single design difference is why most beginners who struggle with bullions are using the wrong needle.
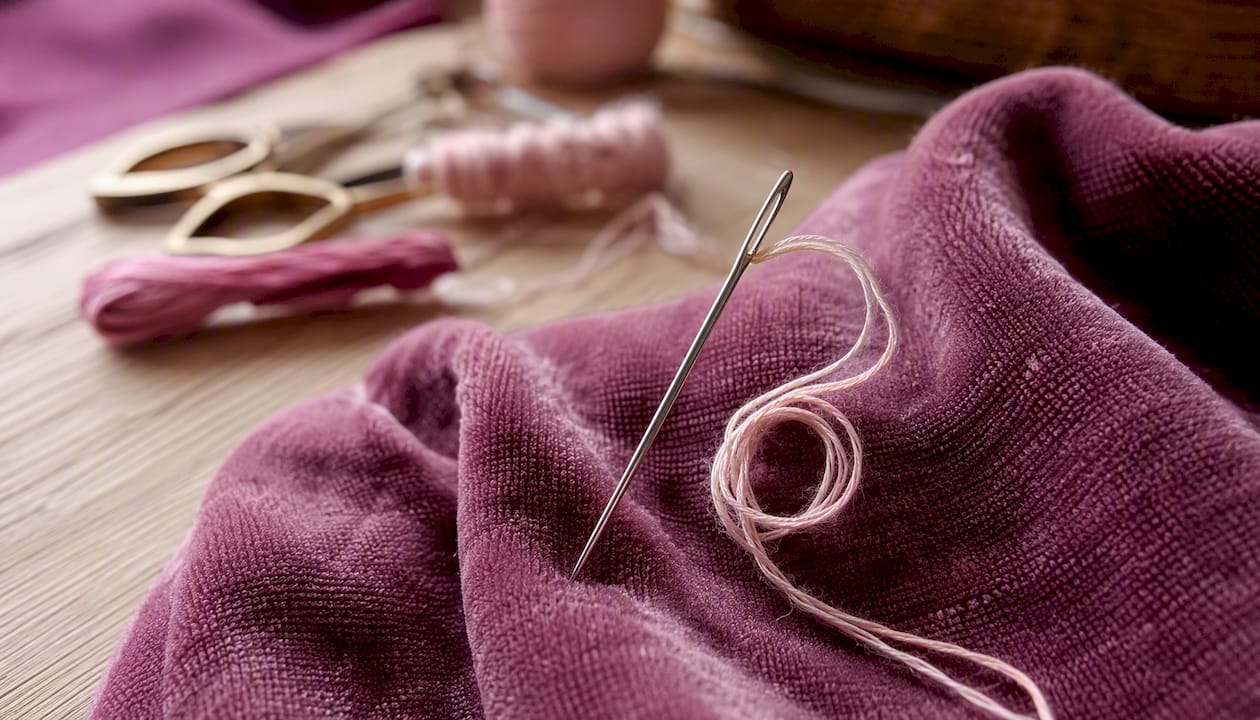
DMC stranded cotton is a reliable starting thread. Its S-twist structure (the fibers spiral in a consistent direction) means clockwise wrapping reinforces rather than unravels the thread. For guidance on how different thread types behave under wrapping, Flossom's embroidery specialty thread guide breaks down cotton, rayon, and silk behavior clearly.
How to tie a bullion knot, step by step
Work with your fabric in a hoop so both hands stay free. A milliner's needle and a few strands of DMC stranded cotton are good starting choices.
- Mark your stitch length. Use a water-soluble pen to mark points A and B on your fabric. The distance between them equals your finished bullion length.
- Bring the needle up at A. Pull the thread through completely.
- Insert the needle down at B. Push it through the fabric, then bring the tip back up at A. Do not pull the needle through yet — leave most of the shaft exposed above the fabric.
- Wrap the thread. Hold the needle steady with your non-dominant hand. With your dominant hand, wrap the working thread clockwise around the needle shaft, working from the fabric surface upward. Count your wraps; the coil should measure roughly the same length as the A–B gap.
- Hold the coil. Place your non-dominant thumb and forefinger gently over the coil to keep it from unwinding.
- Pull the needle through. Draw the needle and thread through the coil slowly and steadily. Keep your grip relaxed — tension is the main cause of jams.
- Ease the coil into place. Slide the coil toward B so it lies flat between A and B.
- Secure at B. Take the needle down at B and pull the thread through to the back. The bullion should sit neatly on the surface.
Video demonstrations are especially useful at steps 5 and 6, where the pulling motion is hard to describe in words. NeedlenThread's video tutorial shows the wrapping and pull-through in real time, which resolves most beginner confusion at those stages.
Pro Tip: Keep your non-dominant thumb pressed lightly on the coil all the way through the pull. The moment you release too early, the coil can twist or bunch. Think of it as holding the coil in a loose fist, not pinching it.
How many wraps, and which direction?
Wrap count controls everything: the stitch's length, whether it lies flat or arches, and how dense the texture looks.
| Wrap count | Visual effect | Typical uses |
|---|---|---|
| 4–6 wraps | Short, compact, slightly raised | Rosebuds, pistils, seed details |
| 7 wraps | Medium length, gentle arch | Open petals, small caterpillars |
| 10 wraps | Long, may curve or arch noticeably | Stems, large petals, textured fills |
| 15+ wraps | Pronounced curve or loop | Curved bullion roses, dimensional loops |
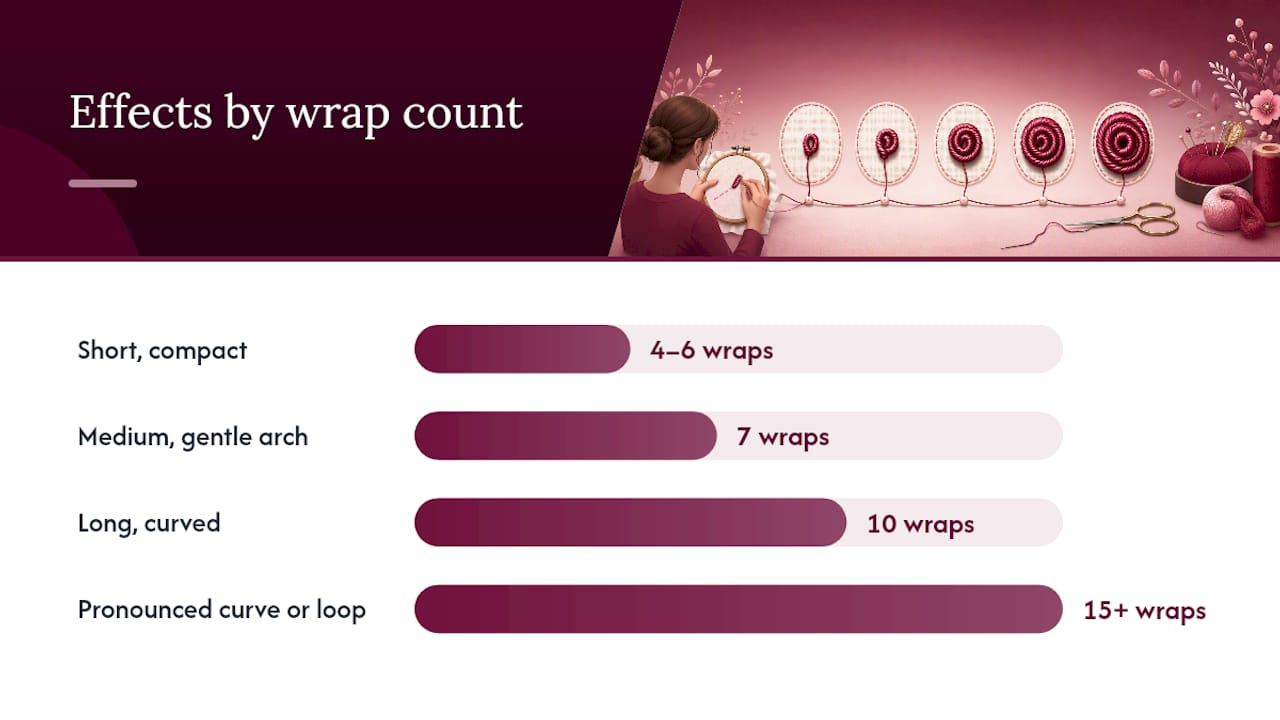
The rule of thumb: match your wrap count to the A–B distance so the coil fits without excess. Too few wraps and the stitch pulls tight and puckers; too many and it buckles into a curve (which is useful for roses, but not for straight fills).
Wrap direction matters because of thread structure. Most commercial embroidery floss, including DMC stranded cotton, is S-twisted. Wrapping clockwise preserves that twist, keeping the thread smooth and the coil tidy. Wrapping counterclockwise works against the spin and can cause the thread to loosen or fray, especially with rayon. If you notice your thread untwisting mid-wrap, switch direction. Left-handed stitchers sometimes find counterclockwise more natural; experiment with a scrap piece to find what keeps your specific thread intact.
Troubleshooting common bullion knot problems
Most bullion failures trace back to one of four causes. Here is how to diagnose and fix each one:
- Coil too tight to pull through. Your wraps are too tight, or you have a standard embroidery needle. Switch to a milliner's needle first. If you already have one, loosen the coil by gently rubbing it between your thumb and forefinger before pulling. Never yank the needle.
- Stitch bunches or puckers. Wrap count exceeds the A–B distance. Remove the stitch (see below) and redo with fewer wraps, or move B slightly farther out.
- Stitch curls or arches unexpectedly. You have more wraps than the gap needs. For intentional curves (roses), this is correct. For straight fills, reduce wraps by 2–3.
- Uneven or lumpy coils. Wraps were applied with inconsistent tension. After pulling through, pass the needle horizontally under the finished bullion and rub it back and forth — the "rubbing the belly" technique — to align the coils before final tensioning.
- Thread untwists or frays. You are wrapping against the thread's spin. Switch to clockwise wrapping for S-twisted threads, or counterclockwise for Z-twisted specialty threads.
To unpick a failed bullion without damaging the fabric: use a seam ripper or the tip of a needle to lift the coil away from the surface, then snip the thread at the back close to the anchor point. Pull the coil free gently. Avoid dragging the thread through the fabric weave, which can distort the ground.
Quick rescue checklist:
- Switch to a milliner's needle if you haven't already.
- Rub the coil gently to loosen before pulling.
- Check wrap count against stitch length.
- Reduce pulling tension; slow and steady beats fast.
- Try clockwise wrapping if thread is untwisting.
Bullion knot variations worth knowing
Once the basic stitch is solid, three variations open up a lot of design territory.
Bullion roses use 5–7 individual bullions arranged in a spiral around a central French knot. The innermost bullions use fewer wraps (4–5); outer "petals" use progressively more (8–12) so they fan outward. Stagger the starting points slightly so no two bullions share the same anchor hole.
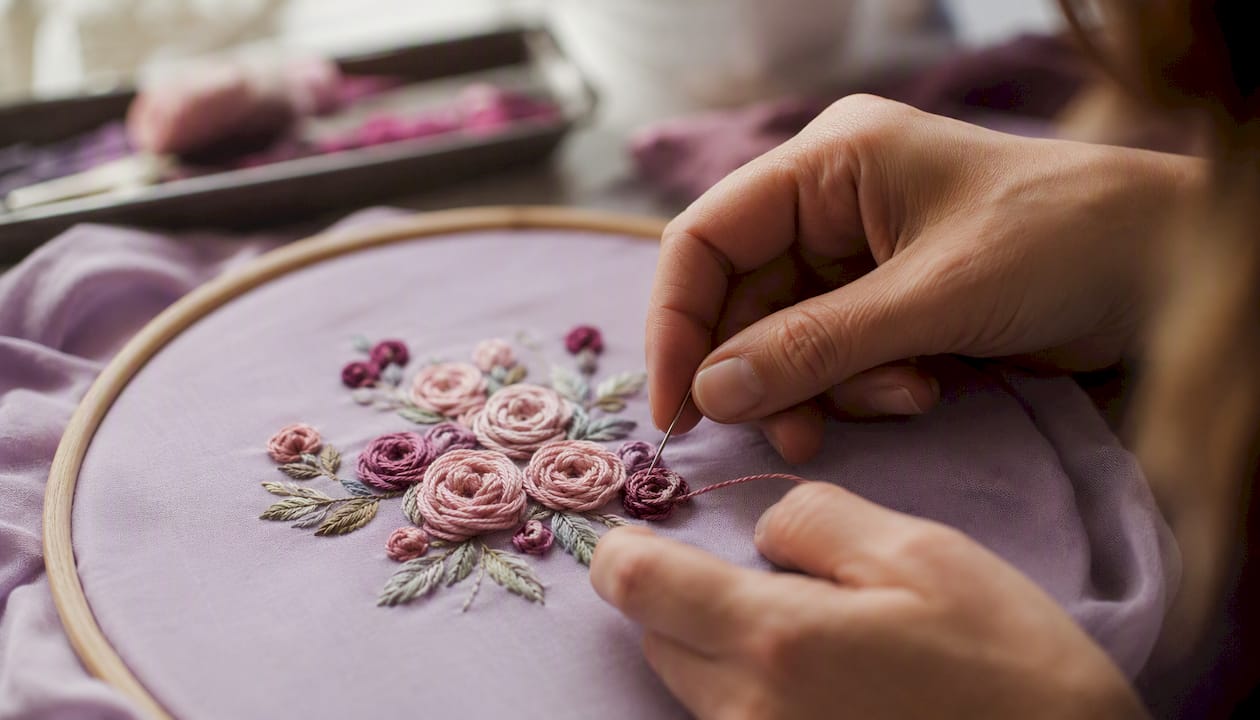
Pistil bullions are short (3–5 wraps), worked straight up from a flower center, and often finished with a small bead or French knot at the tip. They read as stamens at normal viewing distance.
Curved bullions use more wraps than the A–B gap strictly needs, which forces the coil to arch. The degree of curve scales with the excess wraps. These are the building blocks of dimensional roses and stumpwork petals.
Two working methods exist for the basic stitch:
- Standard wrap: wrap the thread around a stationary needle, then pull through. Most tutorials teach this method, and it suits beginners because the needle stays still.
- Wrap-and-slide: rotate the needle slightly as you wrap, distributing tension more evenly along the shaft. Experienced stitchers use this for very long bullions (12+ wraps) where even tension is harder to maintain by hand alone.
Practice drills that build real fluency
Three focused drills, in order of difficulty:
- Short bullion drill (10 minutes). Work 10 bullions in a row on a scrap of linen, each with 4–5 wraps and a consistent stitch length. Success metric: all 10 lie flat with no puckering and no reworks. This isolates the pull-through motion.
- Long bullion line (20 minutes). Work a row of 8–12 wrap bullions end to end, like a caterpillar. Focus on keeping wrap count consistent across all stitches. Success metric: the row looks even in length and height from arm's length.
- Small bullion rose cluster (30–45 minutes). Arrange 5 bullions in a rose formation around a central French knot, varying wrap counts from 4 (inner) to 10 (outer). This drill combines wrap-count control with placement judgment.
Keep a dedicated practice swatch and photograph each session. Flossom's WIP photo tracking lets you upload progress shots directly to a project, so you can see your improvement over time rather than relying on memory. The Flossom project time calculator is also useful for scheduling practice blocks realistically alongside your main WIPs.
Why needle choice and tension actually matter
The mechanics behind the recommendations are worth understanding, because once you see why something works, you stop second-guessing it.
A milliner's needle has a uniform shaft diameter from point through eye. When you pull the coil over the needle, it never hits a wider section. A standard embroidery needle tapers outward at the eye, so the coil jams there every time. That jam is the source of most "I can't pull it through" frustration beginners report.
Tension works the same way. Sharon Boggon of Pintangle notes that wrapping under too much tension causes most beginner failures: the coil locks around the needle shaft and resists the pull. A relaxed, consistent grip — not loose, not tight — lets the coil slide freely.
Thread spin is the third variable. S-twisted threads (the standard for DMC stranded cotton) wrap cleanly clockwise. Wrapping counterclockwise gradually untwists the thread, which makes the coil look fuzzy and can cause individual strands to separate mid-stitch.
- Use a size 3 or 4 milliner's needle for most bullion work.
- Wrap clockwise with S-twisted threads (most commercial floss).
- Keep your grip on the coil firm but not pinching.
- Rub the belly of the bullion after pulling through to align any uneven coils.
Pro Tip: If you are working a long bullion (10+ wraps) and the coil starts to feel resistant mid-pull, stop. Rub the coil gently, re-seat your thumb, and continue pulling. Forcing it through in one motion is what causes the thread to snap or the coil to knot.
An honest note on learning this stitch
The bullion knot has a reputation for being difficult, and that reputation is partly deserved. The first five or ten attempts often feel like a negotiation between the thread, the needle, and your patience. What actually helps is not watching more tutorials — it is doing the short drill above until the pull-through motion feels automatic, then adding wraps gradually.
The stitchers who get there fastest are the ones who keep a practice swatch nearby and treat each failed bullion as data rather than a mistake. Note what went wrong (too tight? too many wraps? wrong needle?), adjust one variable, and try again. That systematic approach is exactly what Flossom's project and WIP tracking is built to support: upload your swatch photos, log your thread choices, and build a record you can actually learn from.
Flossom helps you plan and track bullion projects
Planning a bullion-heavy piece means tracking multiple thread colors, managing wrap-count notes per motif, and keeping your practice swatches organized alongside your main project. Flossom handles all of that in one place: catalog your DMC stranded cotton stash, upload your pattern PDF or a photo of your design, and log WIP progress with photos as you work through each motif.

The free tier covers DMC and Anchor threads with up to three projects, which is plenty for working through the practice drills above and your first bullion rose design. If you stitch across multiple brands or want to convert thread colors between brands as you plan, Flossom Pro covers 55 brands with a camera color picker and barcode scanner. Start organizing your bullion projects with the free Flossom tools today.
Sources
- Bullion knot - RSN StitchBank
- Bullion Knot Stitch - Pintangle Hand embroidery stitches
- Bullion Knot Stitch: Easy Tutorial, Tips & Projects | TREASURIE
- Bullion Stitch
- Hand embroidery tutorial: Bullion knot | Simply Sewing Magazine
- Video Tutorial for Bullion Knots! | NeedlenThread
Recommended
We make Flossom — the calm app for cross-stitchers and embroiderers who want their stash, projects, fabric and shopping list in one tidy place.