Surface Embroidery vs Canvas: What Stitchers Need to Know
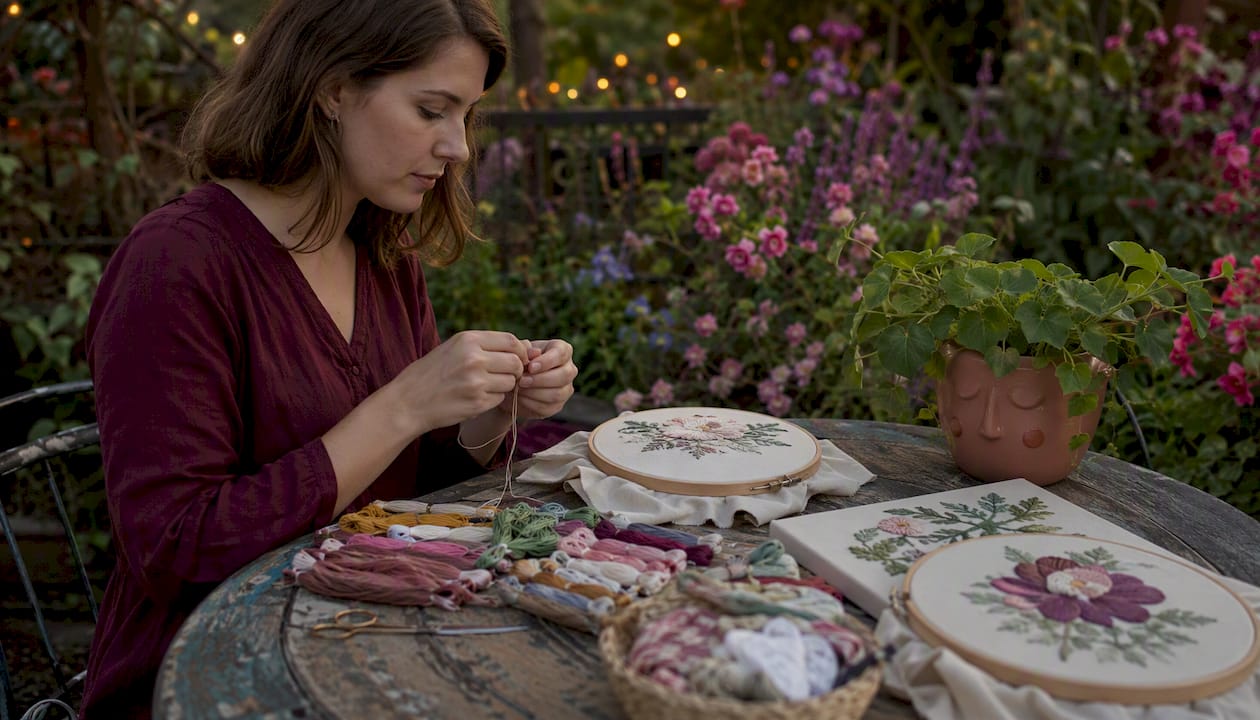
Surface Embroidery vs Canvas: What Stitchers Need to Know ! Stitcher working with embroidery and canvas work Surface embroidery places stitches on top of a woven fabric, leaving the foundation visible and the design choices entirely up to you.
Surface Embroidery vs Canvas: What Stitchers Need to Know
Surface embroidery places stitches on top of a woven fabric, leaving the foundation visible and the design choices entirely up to you. Canvas work (needlepoint) fills an open-weave mesh from intersection to intersection until the canvas disappears beneath a dense layer of yarn. The single-sentence verdict: choose surface embroidery for clothing, fine wall art, and delicate accessories; choose canvas work for cushions, upholstery, and anything that takes daily wear.
Three factors drive almost every other difference between the two:
- Coverage: surface embroidery is additive and selective; canvas work is a fill process that covers the entire foundation.
- Texture and durability: surface stitches sit lightly on fabric; canvas stitches build a thick, resilient textile.
- Tools: surface work needs sharp needles and a hoop; canvas work needs blunt tapestry needles and rigid stretcher bars.
Table of Contents
- How do surface embroidery and canvas work actually differ?
- What do "surface embroidery" and "canvas work" actually mean?
- What materials and tools do you need for each technique?
- Which stitches do you use in each technique?
- What projects is each technique best suited for?
- How hard is each technique to learn?
- How do you decide which technique to use for your next project?
- How do you finish, block, and care for each technique?
- What do needlework authorities say about these techniques?
- Key Takeaways
- The choice is more personal than most guides admit
- Flossom keeps your stash organized across both techniques
- Useful sources for further reading
How do surface embroidery and canvas work actually differ?
| Dimension | Surface embroidery | Canvas work (needlepoint) |
|---|---|---|
| Foundation | Soft woven fabric (cotton, linen, silk) | Stiff open-weave canvas (mono, interlock, Penelope) |
| Stitch approach | Freeform; ignores the weave | Counted; fills mesh intersections |
| Typical threads | Stranded cotton, silk, metallics | Wool, tapestry cotton, Persian yarn |
| Needle type | Sharp crewel or embroidery needle | Blunt tapestry needle |
| Coverage and texture | Partial; foundation often visible; relatively flat | Full; canvas hidden; dense and padded |
| Common finished uses | Garments, framed art, accessories, heirloom pieces | Cushions, upholstery, framed canvases, rugs |
| Frames and tools | Embroidery hoop or lap frame | Stretcher bars, scroll frame, frame stand |
| Durability and care | Delicate; hand-wash with care | Sturdy; spot-clean or gentle hand-wash |
The dimension that matters most depends on your end goal. If the piece will be handled, sat on, or upholstered, full coverage and yarn bulk are what you need. If the piece will hang on a wall or embellish a blouse, partial coverage and a lighter hand are the better fit.
What do "surface embroidery" and "canvas work" actually mean?
The decisive difference is the relationship between the stitches and the foundation beneath them.
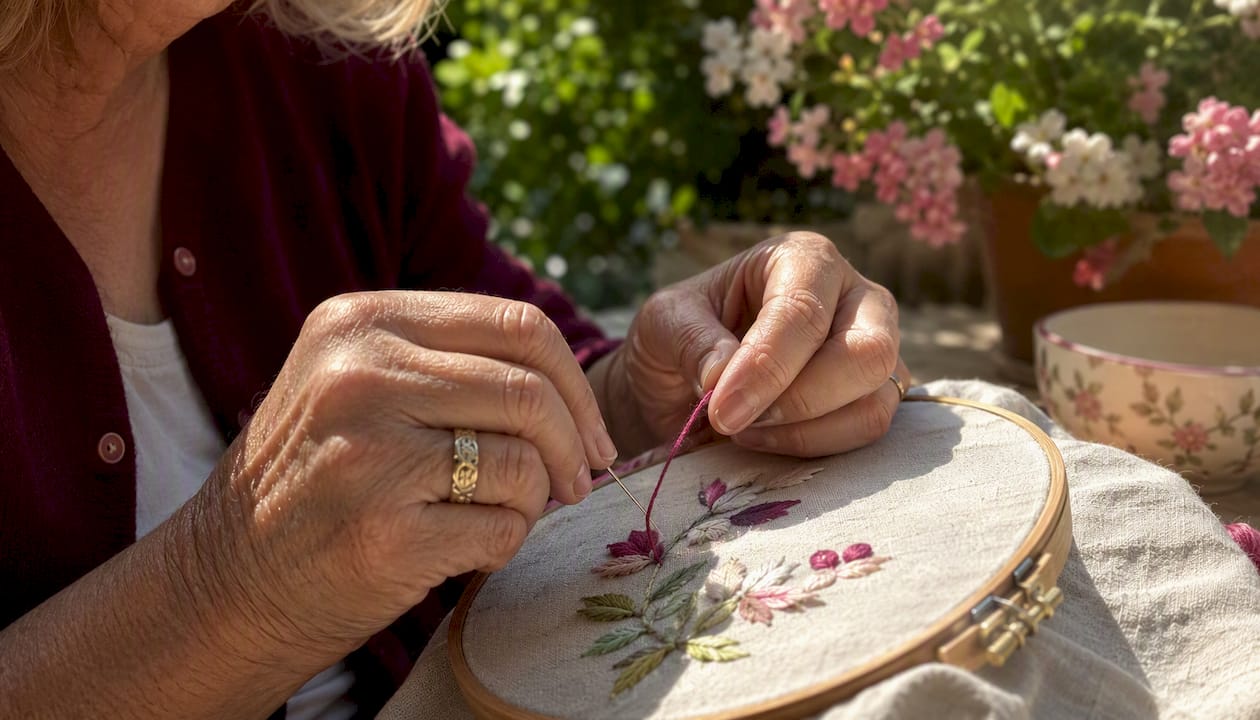
Surface embroidery works independently of the weave. You draw or transfer a design onto fabric, then place stitches wherever the design calls for them, piercing through the fabric threads with a sharp needle. The weave is irrelevant to placement; only the design matters. That freedom is the whole point. You can blend colors gradually, leave large areas of bare fabric, and mix stitch families in a single piece.
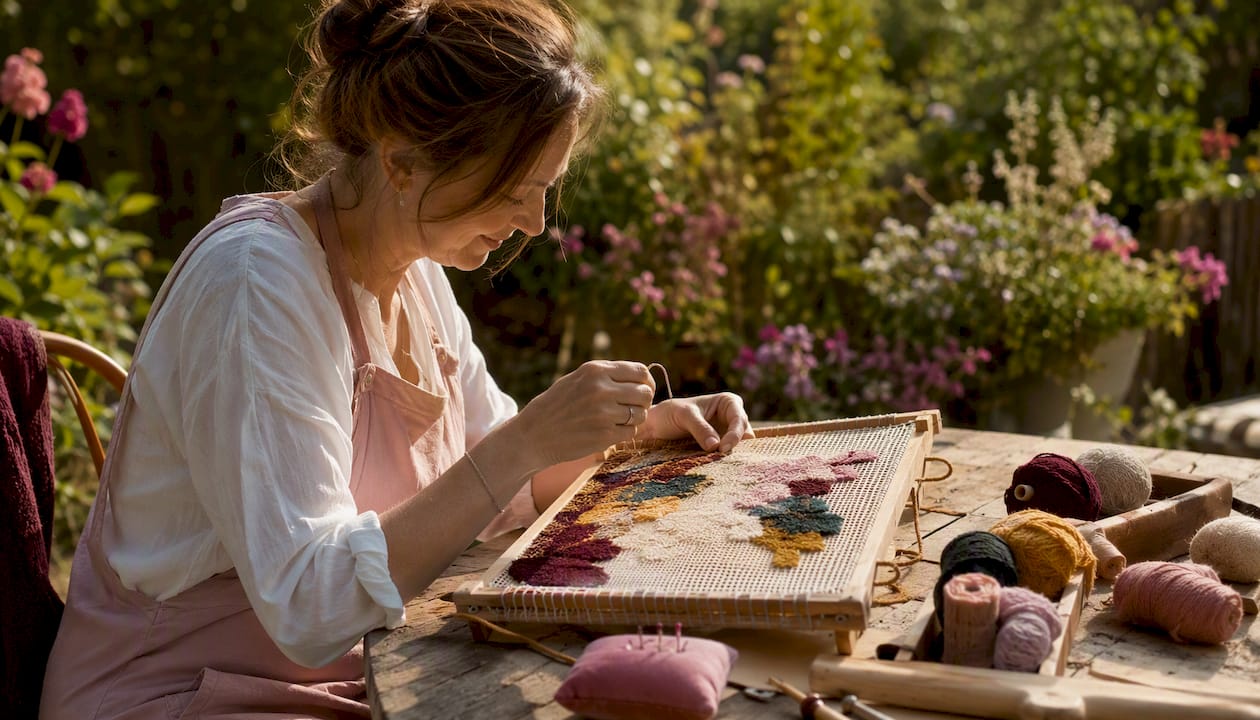
Canvas work is the opposite logic. The canvas is a stiff, open-weave mesh, and every stitch passes between its intersections rather than through the threads themselves. The goal is to fill those intersections until the canvas is completely buried. As the V&A describes it, canvas work often completely covers the canvas and has historically been used for cushions, upholstery, and decorative hangings. The grid is not a constraint to work around; it is the structure you work with.
"Surface embroidery" also functions as a broad umbrella term. Mary Corbet at Needle 'n Thread frames it as a practical catch-all for any freeform needlework that is not constrained by a counted-thread requirement, which is why you will see crewelwork, silk shading, and goldwork all grouped under that label.
Pro Tip: Not sure which type of fabric you have? Try inserting a blunt tapestry needle between the threads without piercing them. If it slides through cleanly, you have an open-weave canvas suited to needlepoint. If it catches or drags, you have a woven fabric for surface work.
What materials and tools do you need for each technique?
Foundation fabrics and canvas types
For surface embroidery, the fabric choice shapes the whole project. Plain-weave cotton (quilting cotton, muslin) is the most forgiving for beginners. Linen gives a crisper finish and holds tension better over large pieces. Silk is beautiful but slippery, so it is worth mounting it in a hoop before you start. Evenweave fabrics like 28-count or 32-count linen sit between the two worlds: you can use them for surface work or for counted techniques.
Canvas work uses a different foundation entirely. The Embroiderers' Guild of America identifies the main canvas varieties:
- Mono canvas: single-thread mesh, the most common starting point; available in counts from 10 to 18 holes per inch (HPI).
- Interlock canvas: threads are locked at intersections, so it resists distortion; good for beginners and large projects.
- Penelope canvas: double-thread mesh that lets you work both large and fine stitches on the same piece.
- Rug canvas: very low count (3–5 HPI), thick yarn, fast results; suited to floor pieces and wall hangings.
Higher HPI gives finer detail (petit point uses 18–24 HPI) but takes considerably longer to fill.
Threads and needles
| Foundation | Recommended needle | Thread type | Typical projects |
|---|---|---|---|
| Cotton/linen fabric | Sharp crewel needle | Stranded cotton (DMC, Anchor), silk | Clothing, framed art, accessories |
| Silk fabric | Sharp embroidery needle, size 10 | Silk floss, fine metallics | Heirloom pieces, fine art |
| Mono/interlock canvas (14–18 HPI) | Blunt tapestry needle, size 20 | Tapestry wool, Persian yarn, cotton | Cushions, framed canvases |
| Penelope canvas | Blunt tapestry needle, size 18–20 | Wool for background, silk for detail | Mixed-scale decorative pieces |
| Rug canvas (3–5 HPI) | Blunt tapestry needle, size 15 | Rug wool, chunky yarn | Rugs, large wall hangings |
The needle tip is not a minor detail. RSN StitchBank confirms that a sharp needle can pierce and damage canvas threads, while a blunt tapestry needle will not pass cleanly through tightly woven clothing fabric. Using the wrong needle is the single most common beginner mistake across both techniques.
Frames and tension tools
Surface embroidery works well in a round hoop (4–8 inches for most projects) or a lap frame for larger pieces. Hoops are inexpensive and portable; the trade-off is that you need to remove the hoop between sessions to avoid hoop marks on delicate fabric.
Canvas work needs rigid support. Stretcher bars (wooden strips that slot together) hold the canvas taut throughout the project, which is critical because canvas distorts under the repeated tension of filling stitches. Scroll frames and floor stands are popular for larger canvases because they keep both hands free for stitching.
Pro Tip: When buying canvas, hold it up to the light. The mesh should be even and the intersections clearly defined. Uneven weave causes uneven stitch coverage, which shows up badly in finished needlepoint.
Which stitches do you use in each technique?
Surface embroidery stitch families
Surface stitches are placed wherever the design calls for them, so the vocabulary is wide. The most useful families for beginners:
- Stem stitch: a rope-like line stitch; the go-to for outlines and curved stems.
- Satin stitch: flat, parallel stitches laid side by side to fill a shape solidly; produces a smooth, almost painted look.
- French knot: a small raised dot formed by wrapping thread around the needle; adds texture and dimension.
- Long-and-short stitch (thread painting): alternating long and short stitches that blend colors row by row; used for realistic shading in petals and animal fur.
A satin stitch fills a leaf shape with smooth, angled threads that catch the light. The fabric around it stays bare, so the design floats on the foundation.
Pro Tip: Start with stem stitch and satin stitch. Together they cover outlines and fills, which means you can complete a recognizable design in a single afternoon and build confidence before tackling French knots or thread painting.
Canvas work stitch families
Canvas stitches are constrained by the grid, so the vocabulary is smaller but the execution is more precise:
- Tent stitch (diagonal): the foundational canvas stitch; a single diagonal stitch over one mesh intersection. Every other canvas stitch is a variation or combination of this.
- Continental stitch: tent stitches worked in horizontal rows; fast but can distort the canvas if used over large areas without a frame.
- Basketweave stitch: tent stitches worked diagonally across the canvas; minimizes distortion and is the preferred method for filling large background areas.
- Petit point: tent stitch worked on very fine canvas (18 HPI and above); produces photographic detail.
A tent stitch covers one intersection of the canvas mesh with a single diagonal thread. Repeat that across an entire 14-count canvas and you get a dense, even surface that looks almost like woven fabric.
Practitioners describe canvas as a fill process where respecting the grid is non-negotiable. Treating canvas like freeform drawing causes design distortion and wastes time unpicking.
What projects is each technique best suited for?
Surface embroidery and canvas work produce fundamentally different textiles, so the best project for each follows naturally from what each technique actually makes.
Surface embroidery shines on:
- Clothing embellishment (collar details, cuffs, denim jackets, linen shirts)
- Framed fine art and botanical studies
- Delicate accessories (bags, hair pieces, brooches)
- Heirloom pieces like christening gowns or wedding handkerchiefs
Canvas work (needlepoint) is the right choice for:
- Throw cushions and pillow covers
- Upholstered chair seats and footstools
- Framed canvases with heavy texture
- Rugs and high-wear floor pieces
The reason comes down to structure. Canvas work produces a dense, resilient textile because the yarn buries itself on the back of the canvas as well as the front, creating a thick, padded surface. Surface embroidery yields a lighter finish where the foundation fabric remains visible and flexible, which is exactly what you want on a garment but exactly wrong for a cushion that gets sat on every day.
A needlepoint cushion and an embroidered cushion illustrate the gap clearly. The needlepoint version will hold its shape, resist abrasion, and look the same after five years of use. The embroidered version will be beautiful but fragile; the stitches can snag, and the fabric may distort under repeated compression.
Pro Tip: For a first canvas project, try a small eyeglass case or a coin purse. The piece is small enough to finish in a weekend, and the structural finish teaches you blocking and backing without committing to a full cushion.
Good starter projects for surface embroidery: a simple floral hoop (4-inch), a monogrammed handkerchief, or a small botanical sprig on a linen tote bag.
Good starter projects for canvas work: a bookmark (14-count mono canvas), a small ornament, or a coaster set.
How hard is each technique to learn?
The honest answer is that they are hard in different ways.
Canvas work is more predictable. The grid tells you exactly where each stitch goes, and the tent stitch is genuinely simple to execute. Beginners often find the structure reassuring: there are no design decisions mid-project, and the coverage is self-evident. The challenge is patience. Needlepoint takes longer than surface embroidery because you fill the entire canvas, and thicker yarns mean more material to manage. Tension must stay rigid and consistent throughout, which is why stretcher bars are not optional on anything larger than a bookmark.
Surface embroidery is faster to start but harder to master. The freedom that makes it appealing also means you are making compositional decisions constantly: where to place a stitch, how to blend two colors, when to stop. Tension is the most common stumbling block. Too tight and the fabric puckers; too loose and the stitches look sloppy. A hoop helps, but developing a feel for even tension takes practice.
A starter plan for canvas work (needlepoint)
- Buy a small piece of 14-count interlock canvas and a skein of tapestry wool in two colors.
- Mount the canvas on stretcher bars before you make a single stitch.
- Practice the continental stitch across a 2-inch square, keeping tension firm and even.
- Switch to basketweave stitch for the second color to see how it reduces distortion.
- Finish by blocking the piece (see the care section below) to correct any remaining distortion.
A starter plan for surface embroidery
- Transfer a simple design (a leaf or small flower) onto cotton fabric with a water-soluble pen.
- Mount the fabric in a hoop, pulling it drum-tight.
- Practice stem stitch along the outline, aiming for even stitch length.
- Fill one shape with satin stitch, keeping stitches parallel and close together.
- Add a French knot center to the flower for texture contrast.
Pro Tip: The fastest way to improve tension in surface embroidery is to stitch with the hoop flat on a table rather than held in your hand. Your non-dominant hand can guide the fabric from below while your dominant hand works the needle from above, which gives you far more control.
How do you decide which technique to use for your next project?
Work through these questions before you buy a single skein of thread.
Checklist:
- Will the finished piece be handled, sat on, or upholstered? If yes, canvas work.
- Do you want the foundation fabric to show as part of the design? If yes, surface embroidery.
- Is the piece going on a garment or a flexible accessory? Surface embroidery.
- Do you want a thick, padded, textile-like finish? Canvas work.
- How much time do you have? Surface embroidery can be faster for selective designs; canvas work requires full coverage and more hours.
- What is your budget? Canvas and wool yarn cost more upfront than cotton fabric and stranded floss.
Decision flow:
- If the piece needs to withstand daily use, choose canvas work.
- If the design involves fine detail on a soft background, choose surface embroidery.
- If you want to combine both (e.g., a surface-embroidered motif on a canvas background), start with the canvas layer first.
- If you are a complete beginner with no preference, start with surface embroidery on cotton fabric: lower cost, faster results, easier to unpick.
- If you want to try canvas work first, buy a pre-printed 14-count interlock canvas kit: the design is already on the canvas, so you only need to learn the stitch.
Shopping hint for a trial project: For surface embroidery, you need one piece of quilting cotton or linen (fat quarter size), one embroidery hoop (5–6 inches), and one skein each of three DMC stranded cotton colors. Total cost is typically under $15. For a canvas trial, a pre-printed 14-count interlock canvas kit with wool included runs $20–$40 and removes all the guesswork about thread quantities. A well-organized shopping list before you head to the store saves a second trip.
How do you finish, block, and care for each technique?
Cleaning and washing
Surface embroidery on cotton or linen can usually be hand-washed in cool water with a gentle detergent, but test a corner first. Silk and metallic threads are the exceptions: metallics can tarnish when wet, and silk can shrink or bleed. When in doubt, spot-clean only.
Canvas work is more tolerant of moisture during blocking, but finished pieces should be spot-cleaned rather than submerged. Wool yarn can felt if agitated in water, and the canvas sizing (the stiffening agent in the mesh) can dissolve with repeated washing.
Blocking and stretching
Blocking is optional for surface embroidery but often helpful if the fabric has distorted in the hoop. Dampen the piece, pin it face-down to a foam board using rust-proof pins, and let it dry flat.
Canvas work almost always needs blocking because filling stitches pull the canvas off-square. The standard method: dampen the canvas thoroughly, stretch it back to its original dimensions on a blocking board, pin every half-inch around the perimeter, and leave it for 24–48 hours. Interlock canvas resists distortion better than mono canvas, but blocking is still good practice.
Backing, mounting, and framing
Surface embroidery for framing is typically mounted on acid-free foam board or stretched over a wooden frame, then placed under UV-protective glass to prevent fading.
Canvas work for cushions needs a backing fabric (cotton twill or upholstery fabric works well) sewn to the finished canvas with a zipper or envelope closure. For framed display, stretch the blocked canvas over a wooden stretcher frame and secure it with staples or lacing on the back.
Pro Tip: Keep finished pieces out of direct sunlight regardless of technique. UV exposure fades both dyed threads and canvas sizing over time. A UV-filtering glass or acrylic front on a framed piece extends its life significantly.
- For long-term storage, roll surface embroidery around an acid-free tube rather than folding it.
- Repair worn canvas areas by re-stitching individual tent stitches with matching yarn; the grid makes spot repair straightforward.
- Avoid storing either technique in plastic bags, which trap moisture and encourage mildew.
What do needlework authorities say about these techniques?
The distinction between surface embroidery and canvas work is not just a hobbyist shorthand. Museums and practitioner organizations treat it as a foundational classification.
The V&A frames canvas work as a historically significant category defined by its relationship to the foundation: the canvas is not a passive background but the structural element that makes the textile possible. That framing has direct implications for conservation. A canvas work piece is conserved differently from a surface-embroidered one because the stitches are load-bearing in a way that surface stitches are not.
"Surface embroidery is a broad, practical umbrella for any decorative stitching that is not constrained by a counted-thread requirement. Hobbyists should focus on what technique they want to achieve rather than on rigid definitions." — Mary Corbet, Needle 'n Thread
The RSN StitchBank reinforces the practical side: surface embroidery ignores the weave and uses sharp needles that pierce fabric threads, which is the exact opposite of the blunt-needle, between-the-threads logic of canvas work. That needle difference is not incidental. It reflects a completely different relationship between the stitcher and the foundation.
The West Kingdom Needleworkers Guild adds useful historical context: "needlepoint" is an American term that only became standard in the modern era. Historically, the technique was called canvaswork, and the word "needlepoint" referred to needle lace. That naming confusion still surfaces when beginners search for supplies and tutorials.
Pro Tip: When reading historical embroidery patterns or museum descriptions, "canvaswork" and "needlepoint" refer to the same technique. "Tapestry" is different: it is a woven textile, not an embroidered one, even though the finished look can be similar.
Key Takeaways
Surface embroidery and canvas work differ most fundamentally in their relationship to the foundation: one adds stitches on top of a woven fabric, the other fills a mesh until the canvas disappears.
| Point | Details |
|---|---|
| Foundation is the core difference | Surface embroidery sits on woven fabric; canvas work fills an open-weave mesh completely. |
| Needle type matters more than most beginners expect | Sharp needles for surface work, blunt tapestry needles for canvas; using the wrong type damages the foundation. |
| Project use drives the choice | Choose canvas work for cushions and upholstery; choose surface embroidery for garments and framed art. |
| Blocking is non-negotiable for canvas | Canvas work almost always distorts during stitching and must be blocked back to shape before finishing. |
| Flossom helps you plan either technique | Upload your pattern, track threads across 55 brands, and auto-generate a shopping list before you buy a single skein. |
The choice is more personal than most guides admit
Most comparison articles treat this as a purely technical question: coverage, needle type, canvas count. Those details matter, but the choice between surface embroidery and canvas work is also a question of how you like to think while you stitch.
Canvas work gives you a grid. Every decision about placement is already made by the design; your job is execution. For some stitchers, that is deeply satisfying. For others, it feels mechanical after the first few sessions. Surface embroidery gives you freedom, but freedom has a cost: you are making micro-decisions constantly, and the results depend on your eye as much as your hands.
The most interesting projects often combine both. A canvas background with surface-embroidered details on top uses the structural stability of needlepoint where it matters (the foundation) and the expressive range of surface work where it shows (the focal point). It is not a common approach in beginner tutorials, but it is worth knowing the option exists once you are comfortable with each technique separately.
One practical note: whichever technique you start with, planning your materials before you buy saves real money. The difference between a successful first project and an abandoned one is usually not skill; it is running out of the right thread color halfway through.
Flossom keeps your stash organized across both techniques
Whether you are buying your first skein of tapestry wool for a needlepoint cushion or restocking DMC stranded cotton for a surface embroidery project, the hardest part is usually knowing what you already own.

Flossom tracks your entire thread and fabric stash across 55 brands, compares what your pattern needs against what you already own, and generates a shopping list for exactly the gap. Upload a pattern PDF, log your canvas and fabric stash, set low-stock alerts so you never run short mid-project, and track WIP progress with photos. The free tier covers DMC and Anchor with unlimited stash entries and three active projects. Pro unlocks all 55 brands, a camera color picker, barcode scanner, and unlimited projects.
Pick a free starter pattern from Flossom's pattern library, such as the April Daisies modern design or the Mother and Baby Hedgehog, add it to your project list, and let Flossom tell you exactly what to buy before you head to the store.
Useful sources for further reading
These are the primary references used in this article. Each one is worth bookmarking for stitch diagrams, historical context, and technique guidance.
- Embroidery styles: an illustrated guide — V&A: The Victoria and Albert Museum's overview of embroidery categories, including canvas work history and application. Authoritative for historical context and institutional definitions.
- Surface — RSN StitchBank: The Royal School of Needlework's practitioner definition of surface (freestyle) embroidery, including needle choice and stitch freedom. The clearest technical definition available.
- Embroidery — Wikipedia: Broad overview of embroidery types including canvas work and counted-thread methods; useful for cross-referencing terminology.
- Needlework Terminology: Surface Embroidery — Needle 'n Thread: Mary Corbet's practical explanation of why "surface embroidery" is an umbrella term, not a rigid category. Essential reading for anyone confused by overlapping terminology.
- Fabric for Embroidery: The Beginner's Guide — Embroiderers' Guild of America: Canvas types, fabric selection, and beginner guidance from the EGA. Particularly useful for understanding canvas count and construction.
- Canvaswork Techniques — The West Kingdom Needleworkers Guild: Historical context on the term "canvaswork" versus "needlepoint," including the medieval origins of the technique and how naming conventions evolved.
- Cross-stitch vs needlepoint vs embroidery — ArtPatt: Hobbyist-focused comparison that explains the additive vs fill distinction clearly; good for beginners sorting out overlapping technique names.
- Flossom — thread and fabric stash organizer: The app referenced in this article for planning materials, tracking stash, and generating shopping lists for both surface embroidery and canvas work projects.
For visual stitch diagrams, the RSN StitchBank and the V&A's online collection are the two best free resources. Museum collection pages often include high-resolution photographs of historical pieces that show exactly how stitches sit on the foundation, which is more instructive than any diagram.
Recommended
We make Flossom — the calm app for cross-stitchers and embroiderers who want their stash, projects, fabric and shopping list in one tidy place.