
Cross Stitchers: Import Pattern Photos and Match Threads in 55 Brands
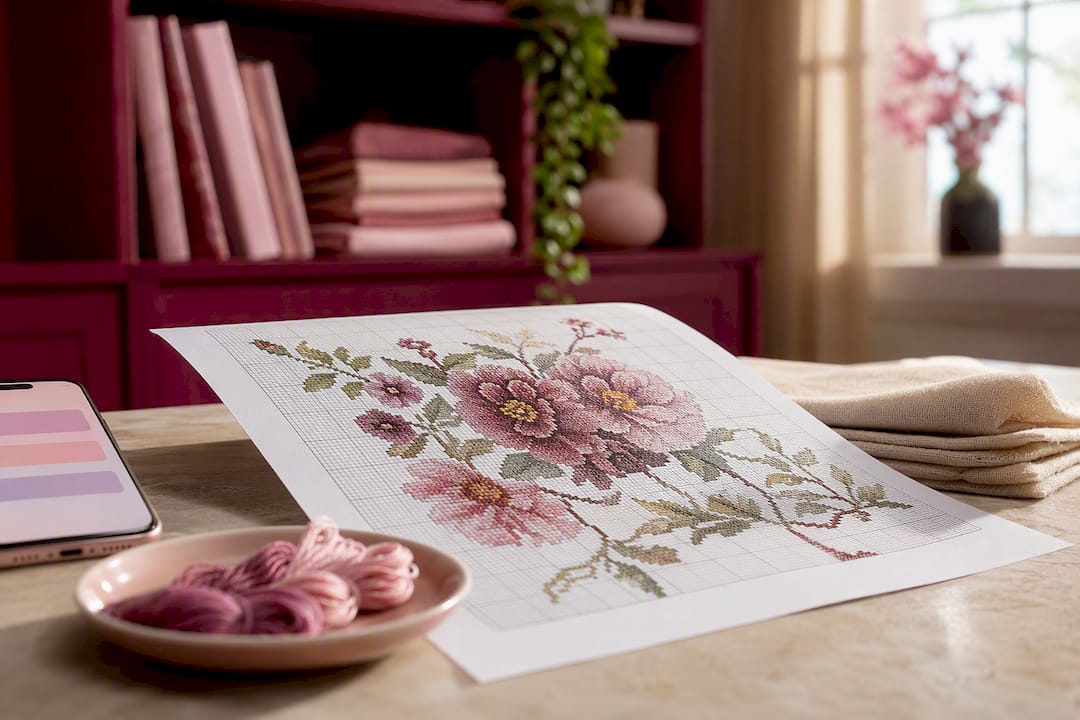
Cross Stitchers: Import Pattern Photos and Match Threads in 55 Brands ! Cross-stitch pattern photo ready for import Upload your pattern as a PDF or a sharp, well-lit photo at 300 DPI or better, then attach it to a project entry.
Cross Stitchers: Import Pattern Photos and Match Threads in 55 Brands
Upload your pattern as a PDF or a sharp, well-lit photo at 300 DPI or better, then attach it to a project entry. From there you add WIP photos as you stitch, tag the project by designer or theme, and let the app compare pattern needs against your stash. In Flossom, that single import unlocks a legend you can reference mid-stitch, a WIP gallery that documents progress, and an auto-generated shopping list for anything you're missing.
TL;DR:
- High-resolution scans at 300 DPI or better are essential, as lower resolutions make small symbols blurry and difficult to read mid-stitch.
- Proper lighting, flat positioning, and tight cropping significantly improve photo clarity, while merging multi-page charts into a single PDF aids pattern management.
- Naming files with a consistent format and tagging projects by designer, theme, and thread brand ensures easy retrieval from a growing pattern library.
- Manual legend entry remains necessary for many patterns, especially PDFs without embedded symbols, and can be simplified by using apps like Flossom.
- Taking an initial WIP photo before stitching provides a valuable reference point for progress and adds context when documenting the project.
Table of Contents
- What Files and Photos You Need Before You Import Pattern Photos
- How Do You Import a Pattern and Start Tracking a Project?
- Naming and Tagging Conventions That Keep Patterns Findable
- Fixing Unreadable PDFs, Bad Colors, and Failed Imports
- How Flossom Handles the Entire Pattern Import Workflow
- Tips for Batch Importing Multiple Patterns at Once
- Cropping and Editing Imported Photos Inside the App
- Pairing Photos with Notes for Richer Project Records
- Why the "Just Take a Photo" Advice Misses the Point
- Try the Import Workflow with Flossom's Free Tools
- Sources
What Files and Photos You Need Before You Import Pattern Photos
Not every pattern file behaves the same way once it hits an app, and knowing the difference before you upload saves you a headache later. A vector or text-based PDF is the gold standard. It keeps symbols crisp at any zoom level and, in apps that offer chart parsing, gives the software actual selectable text to read rather than a flat image. A high-quality JPG or PNG works fine too, especially for photographed patterns or hand-drawn charts, but it's a fallback rather than the ideal.
Resolution matters more than most stitchers expect. Scan pattern pages or photograph them at roughly 300 DPI, which is the threshold where small symbols stay readable when you zoom in on a phone screen mid-stitch. Anything lower and a cluster of similar symbols (a full stitch next to a three-quarter stitch, say) turns into a blur you have to guess at.
If you're photographing a paper pattern instead of scanning it, a few habits make a real difference:
- Shoot in natural daylight or bright, even indoor light. Skip the flash, since it blows out glare on glossy paper.
- Lay the page flat and weigh down curling corners with books or a ruler.
- Shoot straight on, not at an angle, to avoid keystoning that distorts the grid.
- Crop tight to the chart before saving so you're not importing dead white space.
- Combine multi-page charts into a single PDF where your scanning app allows it, rather than uploading eight separate loose images.
Give the file a real name before you upload it. "IMG_4021.jpg" tells you nothing three months from now. "Sampler_ScrollyChristmas_pg1_2025.pdf" tells you everything.
How Do You Import a Pattern and Start Tracking a Project?
Once your files are ready, the actual import is a short, repeatable routine. Here's the order that works best in a stash and project app like Flossom:
- Create the project entry first. Name the project, log the fabric count and color, note your target stitch count, and set a start date. This gives the pattern something to attach to.
- Upload the pattern file. Select your PDF or photo and attach it to that project. If the app offers optional chart parsing, let it try, but don't count on it working every time.
- Attach the pattern image and confirm the legend. If parsing pulled in the thread codes automatically, spot check a handful against the printed key. If parsing failed or the app doesn't offer it, enter the thread legend manually. This step is what a Pattern Keeper compatibility guide points to directly: PDFs need selectable, font-embedded symbols for automated reading to work, and plenty of pattern exports simply aren't built that way.
- Add your first WIP photo. Even a quick shot of blank fabric on day one gives you a baseline. From here, photographing progress periodically turns your project into a visual timeline instead of a vague memory of "started it sometime last spring."
- Tag the project and run the stash comparison. Add tags for designer, theme, and thread brand, then let the app check what the pattern calls for against what's already in your stash. Anything missing lands on a shopping list automatically.
A reasonable photo cadence is every few sessions, or whenever you finish a visually distinct section, like a full block of sky or a face. Caption each one with the date and a one-line note ("finished the border, starting the sampler text") so the gallery reads like a log rather than a random dump of near-identical photos.
Pro Tip: Take your first WIP photo before your first stitch, not after. An "empty fabric" shot gives every progress photo that follows a true before to measure against, and it's oddly satisfying to scroll back to once the piece is finished.
If your pattern is a photographed image you're hoping to convert into a stitchable chart rather than a pre-made design, know that automatic photo-to-pattern conversion works best on images with a limited color palette, and it almost always needs manual cleanup afterward. Don't expect a phone photo of a sunset to become a clean 50-color chart with zero editing.
Naming and Tagging Conventions That Keep Patterns Findable
A pattern library grows fast. Three finished projects in, you'll have a dozen files, and by year three you'll have hundreds. The stitchers who never lose a pattern share one habit: they name and tag consistently from the very first upload, rather than trying to organize retroactively.
A filename format like designer_title_pagenumber_year (for example, MillHill_WinterCardinal_pg1_2025) sorts alphabetically by designer, stays readable at a glance, and never collides with another file. Compare that to a folder full of "Untitled," "Scan1," and "FinalFinal2" and the value is obvious.
Tags do the heavier lifting for retrieval. At minimum, tag each project with:
- Project name and designer, so you can pull up everything from one chart artist in a click.
- Theme (holiday, sampler, portrait, animal) for browsing when you want to start something new.
- Thread brand used, especially if you stitch with more than one line.
- Status (planned, in progress, finished, frogged) so your dashboard reflects reality.
For multi-page charts, label each page clearly within the project (page 1 of 3, legend page, etc.) so the app surfaces the right reference image while you're mid-stitch instead of making you hunt through a folder.
Thread codes deserve their own note. If a designer worked in DMC but your stash is Anchor, or vice versa, converting by hand invites errors. Flossom converts across 55 thread brands, so a pattern written for one line maps cleanly onto whatever you actually own, no spreadsheet required. For patterns built around a photographed color reference rather than printed codes, a tool that matches fabric and thread color from a photo closes that gap without guesswork.
Fixing Unreadable PDFs, Bad Colors, and Failed Imports
Most import problems trace back to one of four causes, and none of them require technical expertise to fix.
Rasterized PDFs that won't parse. If your app's automatic reading feature comes up empty, the file is likely an image-based export rather than a vector, font-embedded PDF. Check whether you can select and highlight text or symbols in the PDF viewer. If you can't, parsing was never going to work, and re-exporting from the original design software (or rescanning at 300 DPI) is your best fix.
- If parsing consistently fails, skip it. Attach the image as reference and enter the thread legend by hand. It takes a few extra minutes and works every time.
- For multi-page patterns, merge pages into one PDF before uploading if your app expects a single file, or attach each page individually to the same project so nothing gets scattered.
- Color looking off in a WIP photo almost always traces back to lighting. Reshoot in natural daylight rather than under a warm bulb, and use a built-in camera color-picker to match ambiguous threads instead of eyeballing it.
- Blurry symbols in a photographed chart usually mean the original capture was below 300 DPI. There's no software fix for that. Rescan or repurchase a digital copy if one's available.
How Flossom Handles the Entire Pattern Import Workflow
Flossom was built around this exact sequence, not adapted from a generic project tracker. The feature set covers each step directly:
- PDF and photo upload, attached straight to a project entry.
- A WIP photo gallery for documenting progress over time.
- Automatic shopping-list generation that compares pattern requirements against your existing stash.
- Conversion across 55 thread brands, a camera color-picker, and a barcode scanner for fast stash entry.
- Fabric stash tracking, CSV import and export, and sync across every device you own.
- No ads, anywhere in the app.
A typical session looks like this: attach the pattern, add a WIP photo after your next session, check the shopping list Flossom built for you, and confirm your stash before you buy anything twice. The free tier covers DMC and Anchor catalogues with unlimited stash entries and up to three active projects, so you can run this exact workflow before deciding whether to upgrade. Author and stitcher Simone built the workflow guidance in this piece around how stitchers actually use pattern apps day to day, not around theoretical best practices.
Tips for Batch Importing Multiple Patterns at Once
If you've been stockpiling PDFs on your hard drive or photos in your camera roll for months, importing one at a time feels like a chore. A few habits speed it up considerably.
Sort before you upload. Group files by designer or by project status (planned versus already started) in your file browser first, so you're not hunting for the same chart twice mid-import. Batch renaming tools, available on both desktop and mobile, let you apply a consistent naming pattern to a whole folder in seconds rather than retyping each filename by hand.
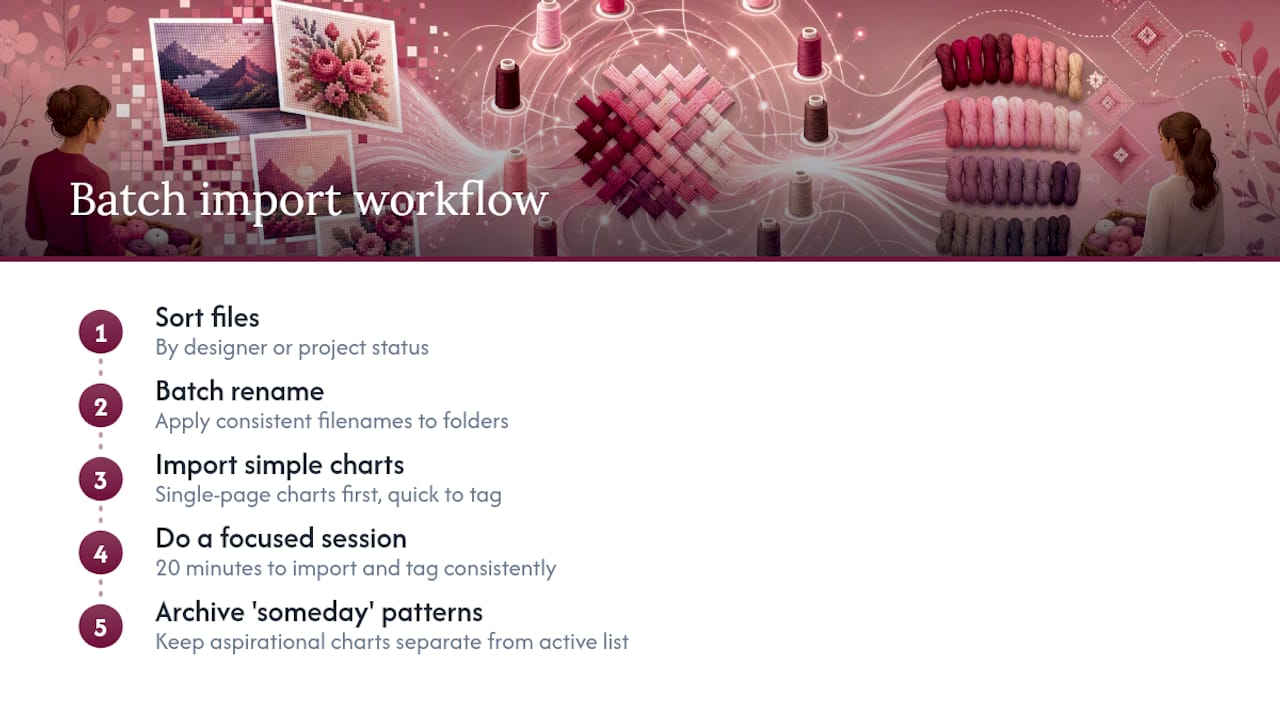
Import metadata-light patterns first. Simple single-page charts take seconds to attach and tag, so clear those out of your backlog before tackling the more time-consuming multi-page samplers that need page-by-page attention.
Set aside a dedicated session rather than trickling imports in over weeks. Twenty minutes with a cup of tea and a stack of PDFs gets your entire backlog into the app in one sitting, and you'll tag more consistently when you're doing it in one focused pass instead of returning to your own system after a month away and forgetting your own conventions.
Finally, resist the urge to import "someday" patterns you're not actually planning to stitch soon. A library bloated with a thousand aspirational charts is harder to navigate than one with fifty you're genuinely excited about. Archive or tag those separately so your active list stays useful.
Cropping and Editing Imported Photos Inside the App
A pattern photo straight out of your camera roll rarely looks the way you want it in a project gallery. Most stash and project apps, including Flossom, include basic editing tools so you don't need a separate photo editor for routine cleanup.
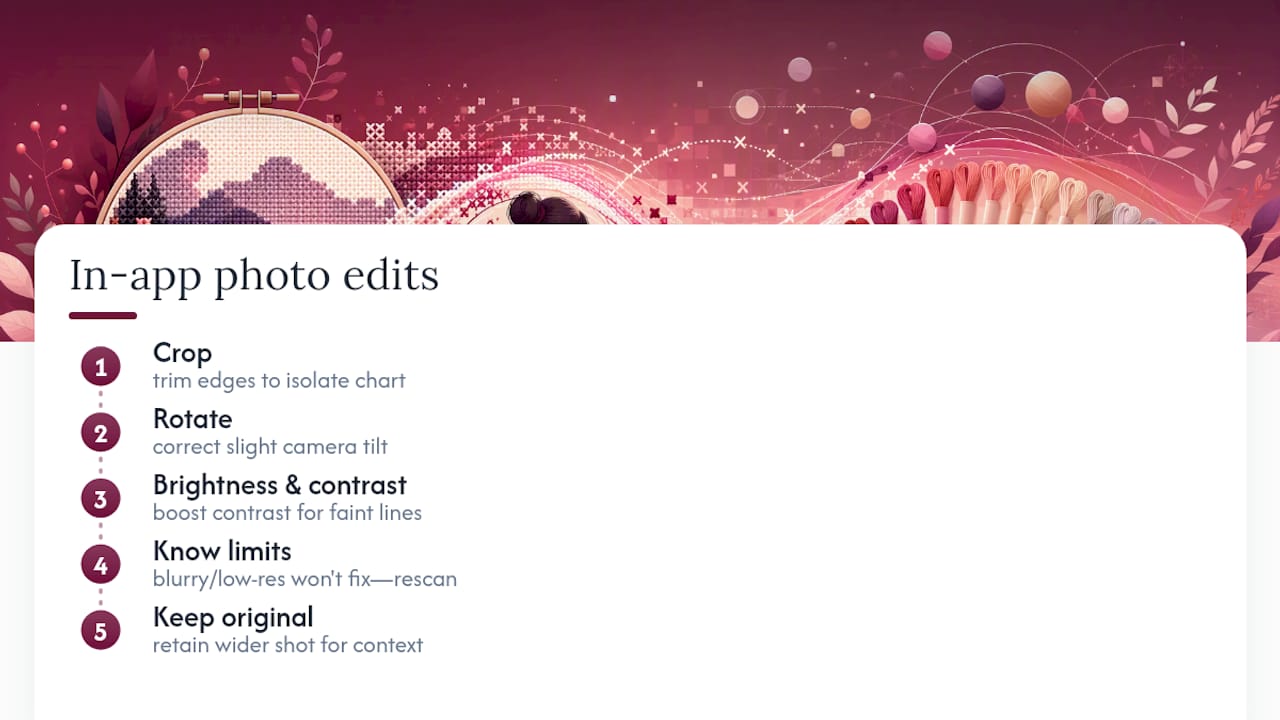
Cropping is the most common fix. Trim excess table or floor visible around the edges of a WIP shot, or cut a pattern photo down to just the chart so you're not scrolling past a photographed hand or ruler every time you reference it. Rotation matters almost as often. Phone cameras frequently save images at a slight tilt, and a few degrees of correction makes a chart far easier to read at a glance.
Brightness and contrast adjustments help most with patterns photographed under weak indoor light. Bumping contrast slightly can make faint pencil grid lines or light-colored symbols easier to distinguish without needing to reshoot the whole page. That said, editing has limits: a photo that's fundamentally blurry or shot at too low a resolution won't improve with contrast tweaks. If cropping and rotating don't get a pattern to a usable state, go back to the source and rescan or rephotograph it at 300 DPI rather than fighting with an in-app filter.
Keep the original, uncropped photo if your app allows storing more than one image per entry. A tightly cropped chart is great for quick reference, but the wider shot sometimes has context, like a designer's border notes, that's worth keeping around.
Pairing Photos with Notes for Richer Project Records
A photo alone tells you what a pattern or a WIP looked like at one moment. Paired with a note, it tells you why that moment mattered, and that's the difference between a photo dump and an actual project record.
Attach a short caption to each WIP photo rather than relying on the timestamp alone. "Switched to a finer needle here, tension improved" is far more useful six months later than a bare date. If you deviated from the printed pattern, changed a thread color, or added a personal touch, that note is the only record of it once the memory fades.
For the pattern file itself, notes work well for tracking things the chart doesn't show: where you bought the pattern, whether it was a gift, or a substitution you made because a discontinued thread color wasn't available. If Flossom's color-matching from photo tool helped you find a substitute for a hard-to-source shade, jotting that down means you won't have to solve the same problem twice on a repeat project.
Annotations also help with legend clarity. If a designer's symbol key is genuinely confusing, a quick note like "triangle = half stitch, not French knot as printed" saves you from misreading your own project a year into a long-term piece.
Why the "Just Take a Photo" Advice Misses the Point
Most pattern-organizing advice stops at "take a picture and save it somewhere." That's not wrong, exactly, but it treats the photo as the finish line instead of the starting point. The real value shows up only once that image is attached to something: a project with dates, a stash it can be checked against, a gallery that shows how the piece actually progressed.
The conventional wisdom also overrates automatic PDF parsing. It's a nice bonus when it works, but plenty of legitimately good patterns export as rasterized images that no app can read symbol by symbol. Stitchers who treat manual legend entry as a failure state end up abandoning otherwise fine patterns. Treat it as a normal five-minute step instead, and the friction mostly disappears.
If there's one thing to prioritize first, it's the habit of attaching a WIP photo before you second-guess whether it's "worth" documenting. The unglamorous early photos, blank fabric, first ten stitches, are the ones that make the finished gallery mean something later.
— Simone
Try the Import Workflow with Flossom's Free Tools
If you've been juggling pattern PDFs in one folder, WIP photos in your camera roll, and thread notes in a separate notebook, Flossom's advantage is simple: it puts all three in one place and does the comparison work for you, so you stop rebuying colors you already own. Every step covered above, from upload to WIP gallery to shopping list, runs inside a single app that syncs across your phone, tablet, and desktop.
 (Screenshot suggestion: a Flossom project page showing an attached pattern PDF alongside a WIP photo gallery and an auto-generated shopping list.)
Before you start a new piece, try the Cross Stitch Project Time Calculator to get a realistic estimate of how long it'll take based on stitch count and fabric, then upload your pattern and start building the WIP gallery for that same project. The free tier covers DMC and Anchor threads with unlimited stash entries and up to three active projects, so you can run the whole workflow this piece just walked through before deciding whether Pro's 55-brand conversion and fabric tracking are worth adding.
Sources
- Good Cross Stitch Pattern PDFs — Symbols, Layout, Pattern Keeper
- A Step-by-Step Guide to Digitizing Cross Stitch Patterns - Craft with Cartwright
Recommended
We make Flossom — the calm app for cross-stitchers and embroiderers who want their stash, projects, fabric and shopping list in one tidy place.